Slow Cooker Ratatouille

It was one of those days. I had no ideas, no incentive to cook, but I had heaps of veggies I felt compelled to use up.

Nothing even remotely appealed to me in the pages of recipes I scrolled through on the net. All I knew was that I couldn’t use the oven because it was just waaaaay too hot. I vacillated between Thermomix and slow cooker recipes but the slow cooker won in the end, simply because I knew I could leave it on overnight.

A lot of slow cooker recipes are deceiving in that they’re not just one-pot: many require you to pre-cook some of the ingredients. To a lazy cook like me that just doesn’t make sense. I want to throw everything into the crockpot at once, put the lid on and walk away.

So when I found a recipe that fit the bill on Voracious Veggie‘s website (direct link below) I proceeded to adapt it… just by adding more stuff, really.

Slow Cooker Moroccan Eggplant

Food FervourHere’s what I used:

1 tablespoon extra virgin olive oil (EVOO), 1 diced onion, 1 finely chopped garlic clove, 1 small diced carrot, 1 teaspoon dried oregano, 1 teaspoon cumin, ½ teaspoon chili powder (double this if you actually want to taste it!), ½ teaspoon paprika, ½ cup tomato paste, 1 cup vegetable stock, 8 mushrooms sliced, 1 small eggplant (cubed), ¼ butternut pumpkin (peeled & cubed), salt & pepper.

And this is all I did:

Pour the oil into the slow cooker, adding the onion, garlic and carrot, followed by the rest of the herbs & spices. Mix in the tomato paste & stock next, then add the mushrooms, eggplant & finally the pumpkin. Season with salt and pepper. Cook on low for at least 8 hours (I left mine on overnight… a total of 14 hours!) You can stir it up every now & then if you like.

Food Fervour
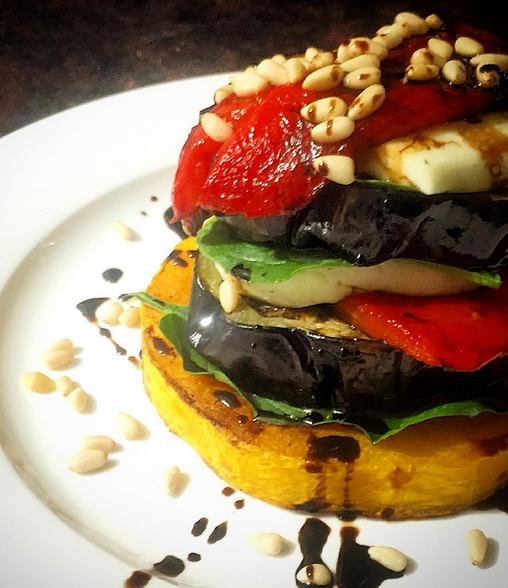
For my first meal, I mixed through fresh basil leaves, then topped the lot with chopped kalamata olives and crumbled feta (see left). Deeelish. For the next serve, I popped a piece of grilled wild salmon on top of a plateful.

There are so many ways you could serve it up. Super simply, with bread or on toast (mmm, melt some parmesan in or over it!) or as a pasta ‘sauce’. The point is, it’s dead easy, it’s packed with micronutrients and fibre, low in fat & complex carbs (for those concerned about them) and …..it’s just EASY!!! (Yes, I repeated myself.)

Don’t despair if you don’t have all of the veggies I used… the following will substitute perfectly : capsicum, zucchini, actual tomatoes (this will significantly increase fluid content FYI) …even cauliflower and broccoli (just don’t expect the broccoli to hold its colour) The more the merrier! Let me know what you use. 🙂

Asparagus & Eggplant Salad with Poached Egg

Time to use up some asparagus! Since it pairs well – and often – with poached egg, I was up for totally up for that today, but I wanted more variety. More veg. With one mini eggplant left in the fridge, I searched for “asparagus eggplant recipes” and found this one pretty quickly… it was quick and easy to boot.

Food Fervour

Here’s what I used:

1 small eggplant, 8 asparagus spears, 3 cherry tomatoes, 1 egg, apple cider vinegar, a handful of rocket, finely grated parmesan cheese, extra virgin olive oil (EVOO)

And here’s what you do:

Quarter the eggplant then slice approximately 5mm thick pieces. Rub the pieces with salt and let rest. Meanwhile chop and discard the bottom 3cm of the asparagus spears then slice into pieces approx 3cm long. Turn the oven grill on to high.

Set a small saucepan on the stove and fill with about 5-6cm water on high heat. Cover and while it comes to the boil, rinse the salt off the eggplant and pat dry with paper towel. Then coat it generously in oil (EVOO) and spread the pieces out under the grill.

Throw the asparagus in the boiling water (to blanch), removing with a slotted spoon after a couple of minutes. Don’t tip out the water, we’re going to recycle it! Set the asparagus aside and check the eggplant; it should be ready to turn over.

Return the saucepan with the water to the stove, adding a dash of apple cider vinegar. Break the egg into a small cup or bowl then, as the vinegar water returns to the boil, grab a spoon and begin stirring the water in one direction quickly to create a ‘whirlpool’. Tip the egg right into the eye of the whirlpool then remove the saucepan from the heat source immediately and cover with the lid. The egg will keep on cookin’ in this hot environment (about 3 minutes for the perfect soft centre) as you continue your prep…

Lay a bed of rocket on your plate, placing the asparagus over the top. Remove the eggplant from the grill and scatter on the plate, then add the quartered cherry tomatoes.

Using the slotted spoon again, gently remove the egg from the saucepan, resting briefly on some paper towel to drain excess fluid, then place on top of the salad. Shower the lot with the grated parmesan, drizzling some EVOO and seasoning with salt and pepper before chowing down. You could add a little vinegar or lemon juice as well if you prefer.

Food FervourIt’s a perfect ‘light meal’ ….but I was a little hungrier than I thought so I ended up cutting a few extra pieces of parmesan to nibble on while I cleaned up. 😛


Veggie Stack

When you’re not particularly hungry, nor inclined to spend a heap of time cooking, but you’re aware that you need to eat some veggies, know that vegetable stacks are pretty easy… and are a relatively easy clean up! Here’s one I threw together a few nights ago:

Food FervourExcuse my (lack of) modesty but damn, it looks kinda good! 😛 And it definitely hit the spot, to boot.

I’m going to describe what I did to create this delicious dish, but bear in mind my directions may be a little askew …not just because I’m a bit hopeless at recording what I do, but also because every grill is different: you’re best off keeping a keen eye on it, checking the contents regularly.

Firstly, I cut 3 slices of eggplant (about 1-1½cm thickness), salting them (both sides) and leaving them to rest, then I switched on the grill (high) and filled a small saucepan about 1cm deep with water, over high heat on the stove. While it was coming to a boil, I cut a 1-1½cm thick slice of butternut pumpkin (from the top end, where it’s solid fruit flesh, not the seed cavity) and trimmed off the thin skin, then popped it in the saucepan. Once boiling, I turned the heat down to low, so the pumpkin could simmer.

I next cut 2 quarters of a red capsicum (trimming the ends and removing seeds and veins), rubbed them with extra virgin olive oil (EVOO) and placed them skin-side up under the grill.  Waiting for the skins to blacken, I grabbed haloumi and baby spinach leaves from the fridge and pine nuts & my beloved caramelised balsamic vinegar from the pantry. Then I cut 3 (approx 5mm thick) slices of the cheese.

Turning the pumpkin slice over in the saucepan, I checked the capsicum: it was charring nicely. I washed the salt from the eggplant slices, patted them dry with paper towel then rubbed them with EVOO as well. The capsicum was ready to turn under the grill so I made room for the eggplant slices too.

Fishing the pumpkin out of the saucepan (it was just softened; not all the way through) I dried it off with some paper towel then oiled it with the EVOO (yeah, it was still pretty warm but I have pretty tough, heat-resilient finger pads!) so it was ready to take the place of the capsicum under the grill. When it seemed soft enough, I made the swap – turning the eggplant over at the same time – and let the capsicum rest skin side up on the chopping board. Unlike me, it’s best to exercise patience if you can and wait for the capsicum to cool before you try to remove the burnt skin. The common way to do this is with clingwrap but I use a small paring knife and my fingers to lift, peel and cut off the stubborn bits. Apart from impatience and/or laziness, I prefer not to use the clingwrap method for environmental and health reasons.

When the eggplant was ready to remove, the haloumi slices took their place and I turned over the pumpkin. From here on in, it was a waiting game, by the grill, knowing the cheese wouldn’t need too long under the heat. I took the pumpkin and haloumi out at the same time, but when I turned off the grill I popped the pine nuts under it. You see, I always burn pine nuts …because I forget about them. So under a cooling grill they’re more likely to end up lightly toasted than charred.

Food fervourI started assembling the stack with some baby spinach leaves on the plate, underneath the pumpkin (but I’ve also thrown them in between layers (see pic right) then laid down an eggplant slice, followed by haloumi and then the capsicum, repeating again and finishing with the last eggplant and haloumi slices. I drizzled my caramelised balsamic vinegar over the top (if you can’t get your hands on this delicacy simply add 1 tablespoon of EVOO and 2 teaspoons of balsamic vinegar to a small jar, tighten the cap and shake vigorously) then sprinkled the pine nuts over the top.

It can prove interesting trying to cut into the stack in a way that allows you to get all of the layers in one fork-full but that should be the least of your worries. A ‘deconstructed’ stack tastes just as good. 😉

Mushroom & Lentil Bolognaise Stew

With Winter smacking us in the face this week, I felt the need for a nice thick, warming stew. But having had (what I considered to be) too much meat for some days prior, I wanted something plant-based… that would satisfy me.

Knowing how damned good legumes are for us (very high fibre and plant-based protein) and having a bag of mushrooms in the fridge that I knew needed to be used up, I began the search for a recipe but as usual, nothing I found comprised a vast array of veggies. So, true to form, I ended up adapting; fusing two different recipes together: one Thermomix Lentil & Veg Stew with a Mushroom & Lentil Bolognaise recipe on taste.com.au.

While I chose to make this using my Thermomix, it could be easily replicated by non-Thermie cooks because it’s a one-pot recipe. But a word of warning to Thermomix users: the quantities I used brought the bowl contents right up to the maximum (2 litres) so if you’re a little reticent, perhaps halve the quantities. It will still result in a decent amount of stew.food fervour

Grab the following:

35ml extra virgin olive oil, 1 onion, 2 garlic cloves, 1 large carrot, 1 stalk celery, 2 potatoes, 170gm uncooked brown lentils, 200gm button mushrooms, 2 tablespoons Thermomix vegetable stock paste + 600gm water (non-Thermies use 700-800ml vegetable stock), 2 bay leaves, 400gm passata (or entire contents of a 400gm tin of tomatoes)

Thermomixers: Add the onion (quartered) garlic cloves, roughly chopped carrot and celery to the bowl and chop for 5 seconds @ Speed 5. Scrape down sides then cook for 3mins @ 100ºC on reverse Speed 1. Meanwhile, dice the potatoes and roughly chop the mushrooms. Scrape down the sides of the bowl, add the potatoes, mushrooms, lentils, stock paste, water, bay leaves and passata (or tomatoes). Stir gently before locking the lid in place and cooking for 45 minutes @ 100ºC on reverse Speed ‘Stir’, with the MC off and the basket (or a light dishcloth draped) over the top to catch splatters.

Stovetop Cooks: Finely chop the onion, garlic, carrot and celery, then warm the olive oil in a large saucepan over a medium heat. Add the veg and cook for 3-5 minutes (until onion has softened) stirring occasionally while you dice the potatoes & roughly chop the mushrooms. Add the potatoes, mushrooms, lentils, stock, bay leaves and passata (or tomatoes) to the saucepan and bring to a gentle boil before reducing to a simmer, partially covered for approximately 40 minutes.

Allow the stew to rest for at least 5 minutes (ThermoServers are the perfect receptacle) before serving so that the some fluid may be further absorbed by the lentils. It’s a perfect meal on its own, or with spiralised zucchini noodles, but you could add some pasta if you feel that you need “carbo-loading” 😉