Super Simple Berry Crumble

I can’t deny my sweet tooth. So I try to work with it, by creating as much as possible without adding processed sweeteners. And by that, I mean even the least processed sweeteners that would be considered ‘better choices’ …like pure maple syrup and raw honey, for example.

food fervourSince it’s berry season here again (and damn, if berries aren’t some of the best fruits you can eat, not just for their lower natural sugar content but also for their prolific nutrient value) but also still technically Winter, I have been playing around with Crumble recipes for a healthier, warm dessert option (but believe me, they are certainly highly edible straight from the fridge and cold the day after) and I’ve arrived at the ideal result …for me.

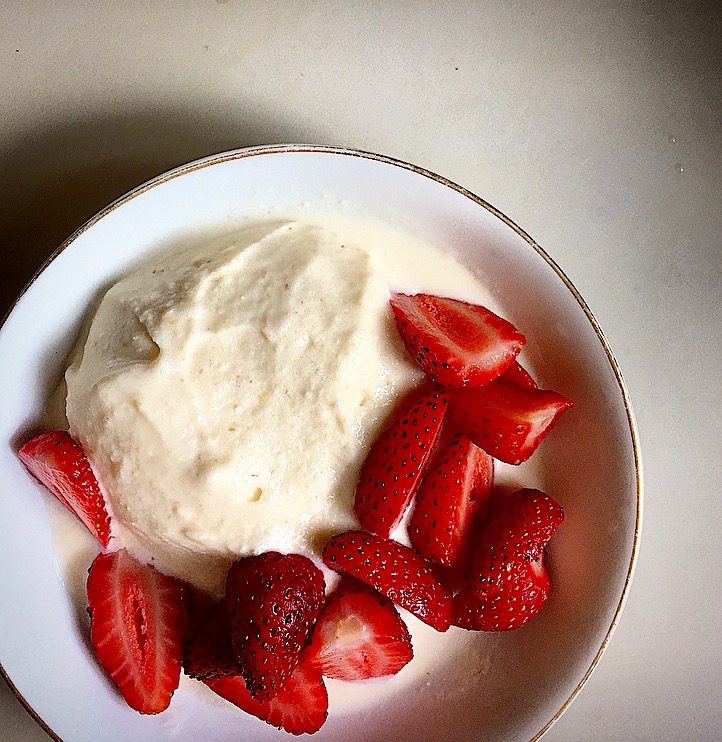
You see, it definitely won’t be as sweet as many of you would expect or desire …so you may want to add sweetener yourself. If so, I’d leave the berries/berry element alone and add something (rapadura or maple syrup) to the crumble mix, if you have to. The other alternative is to serve the dish up with my Macadamia Banana Creme coz it’s naturally sweeeeet!food fervour

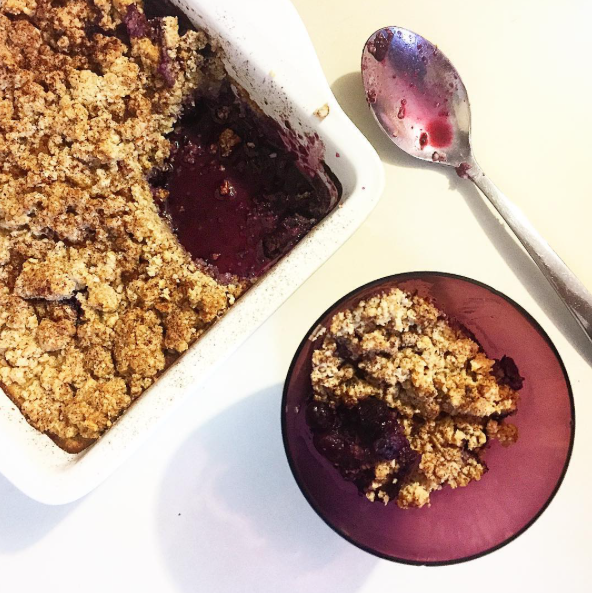
You will need a food processor, powerful blender or …a Thermomix (!) and the following ingredients: 150gm blueberries, 100gm roughly chopped strawberries, 1 teaspoon vanilla essence, 30gm almonds, 60gm oats, 10gm shredded coconut, 50gm coconut/macadamia oil, 1 teaspoon vanilla paste

Preheat the oven to 180°C and grease the base of a small casserole dish (I used a 16x16cm square container) with a little coconut/macadamia oil.

Add 50gm blueberries, 30gm strawberries and vanilla essence to your blending appliance and pulverise these into a sauce. (Thermomixers blend for 10 seconds at Speed 5-6.) Place the remainder of the berries into the casserole dish and thoroughly mix the fresh berry sauce through.

Without rinsing out your processing appliance, throw in the almonds, oats, coconut, coconut oil and vanilla paste (as well as any additional sweetener you may wish to add) and blend briefly: 3 or 4 pulses in a blender or food processor or the Turbo function in a Thermomix. The oil and vanilla paste moisture may make the crumble sticky, but it should be pretty easy to break it apart to spread it evenly over the berry mix.food fervour

Pop it in the oven for 30 minutes, decide what you want to add to it – cream, custard (see left), ice-cream, Macadamia Banana Creme –  and be ready to devour it as soon as it’s done. 😛


Borscht: the Beetroot Soup

I love this stuff! Probably because I know how good beetroot is for you. But this soup has other greatness in it too: onion, leek, carrot and cabbage. They’re all powerful anti-oxidant containing veggies. I particularly like veggies of the allium (onion & leek) and cruciferous families (cabbage) because they help to remove heavy metals from our bods (‘de-toxify’ us) but the old carrot’s beta-carotene (for vitamin A production) content makes it a valuable ingredient too.

Borscht is an Eastern European (think Poland, Russia) dish and traditionally includes meat; usually beef or veal but sometimes pork. I prefer to make mine meat-free, though. But when I say meat-free, I mean there’s no chunks of animal flesh in it. To clarify, I like to use a beef stock. But all you veggos out there rest easy… I have made it on a veggie stock base a few times and it’s still just as delicious.

Soups are pretty easy meals to make but when you have a Thermomix they’re even easier again. I’m providing the recipe for both methods, but the Thermomix will yield less because, unless you’re lucky enough to own the newest model (TM51) it simply doesn’t have the capacity to safely hold the same quantities as a large saucepan can.Food Fervour

So, Manual Cooks, you will need: 1 tablespoon extra virgin olive oil (EVOO), 1 chopped onion, 1 chopped stalk celery, 1 chopped leek, 1 carrot, 2 beetroot, 250gm sliced cabbage, 1 tablespoon tomato paste (or 1 large tomato) & 5 cups beef (or vegetable) stock

Simply warm the EVOO in a large saucepan over a medium heat and add the onion, celery & leek. Sauté for about 3 minutes. Add the carrot, beetroot, cabbage, tomato/paste and stock and bring to a boil. Reduce the heat, cover and simmer for an hour. Carefully blend in batches

Thermomixers, you’ll need: 30gm EVOO, 1 small quartered onion, 1 roughly chopped stalk celery, ½ roughly chopped leek, 1 roughly chopped small carrot, 1 large  roughly chopped beetroot, 150gm sliced cabbage, 1 tablespoon tomato paste (or 1 large tomato), 3½-4 cups beef or vegetable stock

Placing the onion, celery and leek in the bowl, chop for 5 seconds on Speed 5 then add the EVOO and cook for 4 minutes on Varoma, Speed 1.5. Add the carrot, beetroot and cabbage and chop for a further 5 seconds at Speed 5. Add the remaining ingredients and set to cook for 22 minutes at 100ºC, Speed 1-1.5. Finally, set to 1 min 30 seconds and slowly accelerate to Speed 9.

Serve immediately and ENJOY!

Crustless Pumpkin Pie

Okay so Pumpkin Pie isn’t really a ‘Thing’ in Australia. But when you’ve bought a butternut at the farmers markets that’s the size of a human baby, finding ways to use it all becomes a challenge. Especially when you discover that the one kilogram you require for a hefty batch of Thai red curry pumpkin soup leaves you still with two thirds of said vegetable to demolish!

Food Fervour

yep, that’s my big butternut!

A friend once told me that pumpkin should only ever be roasted because “it brings out the flavour”. I discovered he’s dead right: the natural sugars caramelise and boost the veggie’s flavour incredibly. So I always roast it now, and often in quantities over and above anything I happen to be making at the time. That is to say, I roast extra so I’m prepared.

So, with a decent quantity of ready-roasted pumpkin chillin’ in the fridge, I ruminated upon its sweetness and wondered, “Could I successfully make a no added sugar dessert with it?” I considered how sweet the frittatas I made with it were. Could I make a kind of pumpkin ‘dessert’ frittata? That’s when I really began thinking about pumpkin pie… but I certainly didn’t want to have to make pastry for a pie crust. (Hell no! That’s way too much work!) Surely a blend of eggs, cream, some spices & that sweet roasted pumpkin could work?

A Google search for ‘crustless pumpkin pie recipes’ revealed (apart from all of the results being American websites) that their ingredients were pretty much as simple as I’d envisioned. Most of them however use (ugh!) evaporated milk, egg ‘replacer’ or ‘substitute’ and of course, added sugar. God Bless America!

Except for the cooking times (roasting the pumpkin & the final bake) this recipe is ridiculously simple and very time efficient. If you pre-cook the pumpkin as I did, you’ll save even more time. (Really, roasting excess vege is a great, healthy habit to get into; it helps you to stay ‘prepared’. You can save time and expand your meals options for salads, frittatas, risottos …but they also make a better choice of snack if you’re a regular ‘fridge visitor’ like me!)

Now, if you haven’t pre-roasted your pumpkin, the basic method is to preheat your oven to 200ºC, line a tray with baking paper then arrange skinned and roughly cut chunks of lightly oiled pumpkin (EVOO is fine even though you’ll be making a dessert… you won’t even notice the flavour after the roasting) and bake them for 20-30 minutes (depending upon the speed of your oven). Don’t burn them! If a skewer slides in easily & the centre feels soft, you’re done. It’s probably a good idea to let it cool a bit before moving onto the pie recipe.Food Fervour

Here’s what I used for my pie:

430gms of roast pumpkin, 2 eggs, 200gm pure cream, the following spices: 1 teaspoon vanilla paste, 1 teaspoon cinnamon, ½ teaspoon ground ginger, ½ teaspoon nutmeg, ¼ teaspoon ground cloves & a pinch of salt, plus 50gm pecans (optional). What’s also optional is to keep some maple syrup handy to add later if you don’t think the batter is sweet enough for you. (But don’t go overboard; the more you add, the runnier the mix will be…)

Preheat the oven to 180ºC and grease & line a baking dish/casserole dish or round cake tin with baking paper, then simply throw all of the ingredients into a food processor or high-powered blender and mix well. (Thermies: a couple of 10-20 second rounds on Speed 5-6, with some scrape-downs, should suffice.) Pour the ‘batter’ into your prepared receptacle and sprinkle with extra cinnamon, then cook for 40 minutes, or until a skewer comes out clean. Food FervourNB: Because I used a smaller (16x16cm) dish, my pie was thicker so I let it cook for almost an hour. Bear in mind that a thinner pie = potentially less cooking time.

Allow to cool a little before trying to remove from the dish. Slice and serve up with more cream …or just enjoy it undressed. 😛

Instant Lychee Ice Cream

Ice cream is one of my weaknesses. But today I made some here at home, from scratch, and in less than 5 minutes …with two ingredients. Yes, just two, real, whole-food ingredients. No added sugar whatsoever.Food Fervour

All you have to have prepared for instant ice cream is some frozen fruit. I’ve always got fruit in the freezer; blueberries and bananas are staples but over summer I added mango flesh & lychee pulp to my stores and it was the lychee pulp I used to make my ice cream today. It’s sweet but hasn’t an overpowering flavour so it makes for the perfect ice cream to pair with other foods if you wish.

Now, I have to admit, I’ve done this plenty of times before, but with full-fat natural yoghurt. The plethora of gut friendly bacteria in yoghurt does make it a much healthier option but today I just didn’t want that tang. I love frozen yoghurt but I love ice cream more!

In typical fashion, I just threw every thing together in my Magic Bullet without measuring so I’m really guessing with quantities here… but I reckon I used about 1/3 cup of frozen lychee pulp & about 2 (hefty) tablespoons of Maleny Dairies pure cream. Maleny Dairies’ cream is the thickest natural cream I have ever come across so I’m going to add a disclaimer here and say that if you use ordinary, mass-produced pouring cream this recipe won’t work. If you buy your cream from the supermarket, I’m guessing you’ll be better off with ‘double’ or ‘thickened’ cream for this recipe. Similarly, if you’re thinking of trying this with coconut cream (vegans) it will have to be a really thick variety like Ayam brand …not the cheaper supermarket ones.

Simply throw them into your blender together, blend and scrape a couple of times and Bob’s your uncle! I served mine up in a dish with halved strawberries (see pic). You could pop it back in the freezer for awhile if you prefer it more solid… most home made ice cream is put through a number of alternating blend-and-freezes before serving. I just couldn’t wait that long! 😉

Slow Cooker Ratatouille

It was one of those days. I had no ideas, no incentive to cook, but I had heaps of veggies I felt compelled to use up.

Nothing even remotely appealed to me in the pages of recipes I scrolled through on the net. All I knew was that I couldn’t use the oven because it was just waaaaay too hot. I vacillated between Thermomix and slow cooker recipes but the slow cooker won in the end, simply because I knew I could leave it on overnight.

A lot of slow cooker recipes are deceiving in that they’re not just one-pot: many require you to pre-cook some of the ingredients. To a lazy cook like me that just doesn’t make sense. I want to throw everything into the crockpot at once, put the lid on and walk away.

So when I found a recipe that fit the bill on Voracious Veggie‘s website (direct link below) I proceeded to adapt it… just by adding more stuff, really.

Slow Cooker Moroccan Eggplant

Food FervourHere’s what I used:

1 tablespoon extra virgin olive oil (EVOO), 1 diced onion, 1 finely chopped garlic clove, 1 small diced carrot, 1 teaspoon dried oregano, 1 teaspoon cumin, ½ teaspoon chili powder (double this if you actually want to taste it!), ½ teaspoon paprika, ½ cup tomato paste, 1 cup vegetable stock, 8 mushrooms sliced, 1 small eggplant (cubed), ¼ butternut pumpkin (peeled & cubed), salt & pepper.

And this is all I did:

Pour the oil into the slow cooker, adding the onion, garlic and carrot, followed by the rest of the herbs & spices. Mix in the tomato paste & stock next, then add the mushrooms, eggplant & finally the pumpkin. Season with salt and pepper. Cook on low for at least 8 hours (I left mine on overnight… a total of 14 hours!) You can stir it up every now & then if you like.

Food FervourFor my first meal, I mixed through fresh basil leaves, then topped the lot with chopped kalamata olives and crumbled feta (see left). Deeelish. For the next serve, I popped a piece of grilled wild salmon on top of a plateful.

There are so many ways you could serve it up. Super simply, with bread or on toast (mmm, melt some parmesan in or over it!) or as a pasta ‘sauce’. The point is, it’s dead easy, it’s packed with micronutrients and fibre, low in fat & complex carbs (for those concerned about them) and …..it’s just EASY!!! (Yes, I repeated myself.)

Don’t despair if you don’t have all of the veggies I used… the following will substitute perfectly : capsicum, zucchini, actual tomatoes (this will significantly increase fluid content FYI) …even cauliflower and broccoli (just don’t expect the broccoli to hold its colour) The more the merrier! Let me know what you use. 🙂

Broccoli, Kale & Sundried Tomato Frittata

I LOVE frittatas. Mostly because I adore eggs (they’re an incredibly nutrient-dense food) but there’s a host of other reasons…

Frittatas are so. damned. easy. to make. You can put an amazing array of stuff in them (which in turn further inflates their nutritional value) and even better, they can be eaten cold as a healthy snack on-the-run. (They even freeze well …. even though I’ve never tried… coz I eat ’em too quickly!) Apart from the baking time, they’re pretty quick to prep.

I needed to harvest my very healthy kale plant a few days ago, and knowing that I could fit a LOT of leafy greens into a frittata, there was no question about what I’d be making. I had a fair bit of broccoli lolling about in the fridge too so grabbed that, but knew I’d need some ‘punchier’ flavour …so I pulled out the sundried tomatoes. And my addiction to turmeric (more specifically its nutritional powers) has reached the point where virtually every egg dish I make features it. This explains the ridiculously intense yellow colouring:Food Fervour

I used the following ingredients:
125gm broccoli florets, 100gm finely chopped kale leaves (if you find kale too strong in flavour you could easily substitute with spinach) 40gm finely chopped sundried tomatoes, 6 eggs, 1 (heaped!) tablespoon of freshly grated turmeric (you could use the powdered stuff, and less of it, if you’re not as fanatical about it as I) salt & black pepper (important inclusion to help your body receive turmeric’s power) 40gm grated cheddar (or parmesan if you prefer) plus extra for topping.

Super simple instructions:

Pre-heat the oven to 180ºC, grease (I use EVOO, that is extra virgin olive oil) and line a shallow baking dish with baking paper, set aside.

First you’ll need to steam your broccoli & kale. The broccoli will take only slightly longer than the kale, so place a steamer in a medium-large saucepan (unless you have another method of doing this – I have a Thermomix – yay for me!) with about one centimetre of water. Whack on the lid and as soon as it comes to the boil, pop in the broccoli. It should only take 3-4 minutes, tops. Haul it out, set it aside, and then throw in all the kale. This should only take about 2 minutes. You just want it to wilt. (Thermies, fill the bowl to the blades, pop the broccoli in the basket and cook 6 minutes Varoma, speed 1-1½. When done, set the broccoli aside, put the kale in the basket and cook for another 2-3 minutes, same temp & speed.)

The broccoli can be laid in the bottom of the baking dish immediately. Then you need to squeeze excess fluid from the kale. You could do this by hand (clean hands of course!) but I use paper towel so that I don’t lose any of the green to my fingers.

Next up, simply beat the eggs with the turmeric, salt and pepper. (Thermies: 5 seconds or so at Speed 5) then pop the kale, sun-dried tomatoes and grated cheese in and mix thoroughly (by hand… you don’t want to pulverise the veggies!)

Now, I opted to spoon the solids (the kale, tomato & cheese) into the baking dish, to fill in the gaps between the broccoli florets … I guarantee if you try to pour the whole mix out you’ll end up with a pile of vege in one spot! Call me OCD, but I’m fairly sure it’ll cook better if the liquids & solids are evenly distributed. I dribbled the remaining egg mix evenly throughout the dish as well.

Food FervourThe final step is to grate however much extra cheese you want, over the top of the entire dish then whack it in the oven for 30-40 minutes (just check it at the half hour mark: when it appears quite solid in the middle, it should be ready).

Unless your knife is very sharp, I’d let it cool a bit before slicing it into pieces. And I dare you NOT to eat any when you do this… 😉

Banoffie Berries

There’s no question I’m a Sweet Tooth. For some reason, I usually want some dessert after dinner …even if I’m full. But it’s always a healthy option; usually fruit & nuts with yoghurt.

Tonight however, I had some leftover cream in the fridge. And an overripe banana in my fruit bowl. Now, although I’ve never eaten much of it, I love Banoffi Pie. Cream + banana = Banoffi  😛

This is basically a pimped up version of Strawberries & Cream: that was the original plan until I spotted the banana and the cogs began turning. The best thing about this is that the natural sugars in the overripe banana mean no added sugar is necessary in the cream. This dessert is super quick, easy and created from just four whole, natural ingredients.

Food FervourNB: I used a specific brand of cream that is naturally very thick (Maleny Dairies) so I can’t vouch for how well this may work for ordinary supermarket brand creams.

All you need for a single serve is: approximately 2 tablespoons of cream, 1 small overripe banana, fresh strawberries and a handful of fresh blueberries.

Finely chop the banana then simply mix vigorously with the cream, using a fork. (It might seem like a bit of work but using a blender could result in banana butter if you’re not careful. Besides, who wants to add a blender to the washing up?) Being overripe, the banana should break up pretty easily.

Simply chop your strawberries, top with the ‘Banoffi’ mix, toss over the blueberries and devour. Deeeelicious!


Asparagus & Eggplant Salad with Poached Egg

Time to use up some asparagus! Since it pairs well – and often – with poached egg, I was up for totally up for that today, but I wanted more variety. More veg. With one mini eggplant left in the fridge, I searched for “asparagus eggplant recipes” and found this one pretty quickly… it was quick and easy to boot.

Food Fervour

Here’s what I used:

1 small eggplant, 8 asparagus spears, 3 cherry tomatoes, 1 egg, apple cider vinegar, a handful of rocket, finely grated parmesan cheese, extra virgin olive oil (EVOO)

And here’s what you do:

Quarter the eggplant then slice approximately 5mm thick pieces. Rub the pieces with salt and let rest. Meanwhile chop and discard the bottom 3cm of the asparagus spears then slice into pieces approx 3cm long. Turn the oven grill on to high.

Set a small saucepan on the stove and fill with about 5-6cm water on high heat. Cover and while it comes to the boil, rinse the salt off the eggplant and pat dry with paper towel. Then coat it generously in oil (EVOO) and spread the pieces out under the grill.

Throw the asparagus in the boiling water (to blanch), removing with a slotted spoon after a couple of minutes. Don’t tip out the water, we’re going to recycle it! Set the asparagus aside and check the eggplant; it should be ready to turn over.

Return the saucepan with the water to the stove, adding a dash of apple cider vinegar. Break the egg into a small cup or bowl then, as the vinegar water returns to the boil, grab a spoon and begin stirring the water in one direction quickly to create a ‘whirlpool’. Tip the egg right into the eye of the whirlpool then remove the saucepan from the heat source immediately and cover with the lid. The egg will keep on cookin’ in this hot environment (about 3 minutes for the perfect soft centre) as you continue your prep…

Lay a bed of rocket on your plate, placing the asparagus over the top. Remove the eggplant from the grill and scatter on the plate, then add the quartered cherry tomatoes.

Using the slotted spoon again, gently remove the egg from the saucepan, resting briefly on some paper towel to drain excess fluid, then place on top of the salad. Shower the lot with the grated parmesan, drizzling some EVOO and seasoning with salt and pepper before chowing down. You could add a little vinegar or lemon juice as well if you prefer.

Food FervourIt’s a perfect ‘light meal’ ….but I was a little hungrier than I thought so I ended up cutting a few extra pieces of parmesan to nibble on while I cleaned up. 😛


Zoodles with Chickpeas & Pesto

It was time to harvest my crazy flat leaf parsley plant today. Because parsley is rarely the star in any recipe, I kinda knew I’d be making a pesto. What else can you make with an over-abundance of any green herb? I chose a Parsley & Walnut recipe I found on Taste.com.au (link to that recipe here ) …but halved the ingredients because (1) I’m single and don’t eat much and (2) I didn’t really have enough parmesan cheese left to make the full batch…

Now even before I’d finished creating it I knew how I’d be enjoying the first serving: zoodles. Zucchini noodles, for those not in the know. Because I’m not a huge fan of Italian food – pasta and the like – I’m a bit clueless about the uses of pesto: besides as a dip, all that comes to mind is its presence in pasta dishes (total cliche). So, there it was: raw zucchini spiralled into spaghetti-like strands, to be crowned with my parsley pesto… BUT… what in between? I can’t just do ‘pasta’ & pesto: I mean, where’s the nutrient density in that? ‘Myright?Food Fervour

This is how my (single serve) meal came together:

I popped a frypan on the stove, splashing in a little EVOO and setting it to a low heat. Then I cut about a quarter of a red capsicum slicing it thinly lengthwise. I added it to the frypan.

Next I ‘zoodled’ (spiralled) half of a medium sized zucchini, and arranged the ‘pasta’ bed on my plate. I added approximately ¼ cup of (cooked) chickpeas to the frypan, with the now softening capsicum and gave it a little stir. Then I retrieved some feta & my freshly made pesto from the fridge, and my nutritional yeast from the pantry. There really wasn’t much left to do…

With the chickpeas warmed and the capsicum soft, it was time to plate. (Too easy, right?) I topped the zoodles with the capsicum first, creating a kind of ‘nest’ with them, then I tipped the chickpeas into the centre. Plopping a good dollop of the pesto on top of them, I cut a little piece (maybe 20gms?) of feta, crumbled it over the lot and finished with a sprinkle of (about 1 teaspoon of) nutritional yeast.

It’s a nice light veggie meal, like a ‘warm salad’ in a respect. I found the sweetness of the capsicum tempered any bitterness of the walnut & parsley pesto, and then there was delicious saltiness of the feta and nutritional yeast. If you want to give it a go (NB vegans simply omit the feta) I’d love to know what you think. 🙂

Berry Protein Shake

What do you do when you have a heaps of berries you’d prefer to use up before you head to the farmer’s markets the next morning?

And what if you’re needing a protein injection because you’ve just performed a resistance (weight-training) session?

And you’ve just created a new batch of yoghurt from some Maleny Dairies milk, so your Thermomix is already ‘soiled’?

Well. Here’ what I did:

Food FervourI threw 20gms almonds in and milled them (Speed 10) for about 4 seconds, then added 150gm of the amazing full cream Maleny milk, about 40gms of frozen custard apple flesh (this is of course optional but I highly recommend it to thicken and sweeten the shake) and an unknown quantity (…but it was lots…) of strawberries and/or blueberries, firing it up to Speed 10 for 40 seconds. I certainly didn’t feel hungry after that.

NB: If this doesn’t seem like enough protein to you, simply mill a greater quantity of almonds: their protein content ratio is higher than that of the cow’s milk (but so is the fat content if you’re concerned about that). And if you’re not a dairy consumer, this is good news for you: you ain’t missin out. 😉