Crustless Pumpkin Pie

Okay so Pumpkin Pie isn’t really a ‘Thing’ in Australia. But when you’ve bought a butternut at the farmers markets that’s the size of a human baby, finding ways to use it all becomes a challenge. Especially when you discover that the one kilogram you require for a hefty batch of Thai red curry pumpkin soup leaves you still with two thirds of said vegetable to demolish!

Food Fervour

yep, that’s my big butternut!

A friend once told me that pumpkin should only ever be roasted because “it brings out the flavour”. I discovered he’s dead right: the natural sugars caramelise and boost the veggie’s flavour incredibly. So I always roast it now, and often in quantities over and above anything I happen to be making at the time. That is to say, I roast extra so I’m prepared.

So, with a decent quantity of ready-roasted pumpkin chillin’ in the fridge, I ruminated upon its sweetness and wondered, “Could I successfully make a no added sugar dessert with it?” I considered how sweet the frittatas I made with it were. Could I make a kind of pumpkin ‘dessert’ frittata? That’s when I really began thinking about pumpkin pie… but I certainly didn’t want to have to make pastry for a pie crust. (Hell no! That’s way too much work!) Surely a blend of eggs, cream, some spices & that sweet roasted pumpkin could work?

A Google search for ‘crustless pumpkin pie recipes’ revealed (apart from all of the results being American websites) that their ingredients were pretty much as simple as I’d envisioned. Most of them however use (ugh!) evaporated milk, egg ‘replacer’ or ‘substitute’ and of course, added sugar. God Bless America!

Except for the cooking times (roasting the pumpkin & the final bake) this recipe is ridiculously simple and very time efficient. If you pre-cook the pumpkin as I did, you’ll save even more time. (Really, roasting excess vege is a great, healthy habit to get into; it helps you to stay ‘prepared’. You can save time and expand your meals options for salads, frittatas, risottos …but they also make a better choice of snack if you’re a regular ‘fridge visitor’ like me!)

Now, if you haven’t pre-roasted your pumpkin, the basic method is to preheat your oven to 200ºC, line a tray with baking paper then arrange skinned and roughly cut chunks of lightly oiled pumpkin (EVOO is fine even though you’ll be making a dessert… you won’t even notice the flavour after the roasting) and bake them for 20-30 minutes (depending upon the speed of your oven). Don’t burn them! If a skewer slides in easily & the centre feels soft, you’re done. It’s probably a good idea to let it cool a bit before moving onto the pie recipe.Food Fervour

Here’s what I used for my pie:

430gms of roast pumpkin, 2 eggs, 200gm pure cream, the following spices: 1 teaspoon vanilla paste, 1 teaspoon cinnamon, ½ teaspoon ground ginger, ½ teaspoon nutmeg, ¼ teaspoon ground cloves & a pinch of salt, plus 50gm pecans (optional). What’s also optional is to keep some maple syrup handy to add later if you don’t think the batter is sweet enough for you. (But don’t go overboard; the more you add, the runnier the mix will be…)

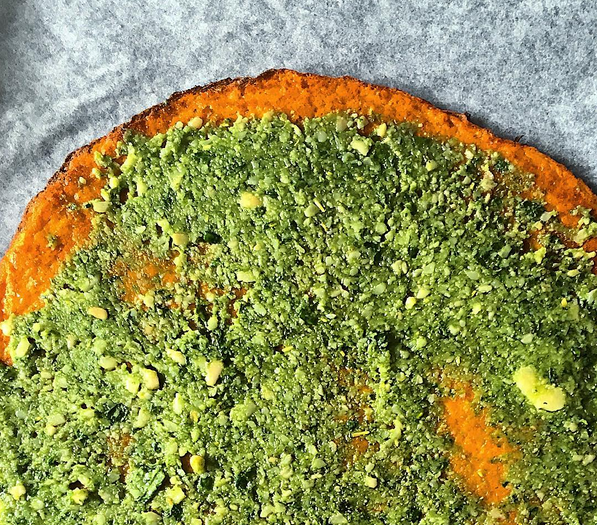
Preheat the oven to 180ºC and grease & line a baking dish/casserole dish or round cake tin with baking paper, then simply throw all of the ingredients into a food processor or high-powered blender and mix well. (Thermies: a couple of 10-20 second rounds on Speed 5-6, with some scrape-downs, should suffice.) Pour the ‘batter’ into your prepared receptacle and sprinkle with extra cinnamon, then cook for 40 minutes, or until a skewer comes out clean. Food FervourNB: Because I used a smaller (16x16cm) dish, my pie was thicker so I let it cook for almost an hour. Bear in mind that a thinner pie = potentially less cooking time.

Allow to cool a little before trying to remove from the dish. Slice and serve up with more cream …or just enjoy it undressed. 😛

Broccoli, Kale & Sundried Tomato Frittata

I LOVE frittatas. Mostly because I adore eggs (they’re an incredibly nutrient-dense food) but there’s a host of other reasons…

Frittatas are so. damned. easy. to make. You can put an amazing array of stuff in them (which in turn further inflates their nutritional value) and even better, they can be eaten cold as a healthy snack on-the-run. (They even freeze well …. even though I’ve never tried… coz I eat ’em too quickly!) Apart from the baking time, they’re pretty quick to prep.

I needed to harvest my very healthy kale plant a few days ago, and knowing that I could fit a LOT of leafy greens into a frittata, there was no question about what I’d be making. I had a fair bit of broccoli lolling about in the fridge too so grabbed that, but knew I’d need some ‘punchier’ flavour …so I pulled out the sundried tomatoes. And my addiction to turmeric (more specifically its nutritional powers) has reached the point where virtually every egg dish I make features it. This explains the ridiculously intense yellow colouring:Food Fervour

I used the following ingredients:
125gm broccoli florets, 100gm finely chopped kale leaves (if you find kale too strong in flavour you could easily substitute with spinach) 40gm finely chopped sundried tomatoes, 6 eggs, 1 (heaped!) tablespoon of freshly grated turmeric (you could use the powdered stuff, and less of it, if you’re not as fanatical about it as I) salt & black pepper (important inclusion to help your body receive turmeric’s power) 40gm grated cheddar (or parmesan if you prefer) plus extra for topping.

Super simple instructions:

Pre-heat the oven to 180ºC, grease (I use EVOO, that is extra virgin olive oil) and line a shallow baking dish with baking paper, set aside.

First you’ll need to steam your broccoli & kale. The broccoli will take only slightly longer than the kale, so place a steamer in a medium-large saucepan (unless you have another method of doing this – I have a Thermomix – yay for me!) with about one centimetre of water. Whack on the lid and as soon as it comes to the boil, pop in the broccoli. It should only take 3-4 minutes, tops. Haul it out, set it aside, and then throw in all the kale. This should only take about 2 minutes. You just want it to wilt. (Thermies, fill the bowl to the blades, pop the broccoli in the basket and cook 6 minutes Varoma, speed 1-1½. When done, set the broccoli aside, put the kale in the basket and cook for another 2-3 minutes, same temp & speed.)

The broccoli can be laid in the bottom of the baking dish immediately. Then you need to squeeze excess fluid from the kale. You could do this by hand (clean hands of course!) but I use paper towel so that I don’t lose any of the green to my fingers.

Next up, simply beat the eggs with the turmeric, salt and pepper. (Thermies: 5 seconds or so at Speed 5) then pop the kale, sun-dried tomatoes and grated cheese in and mix thoroughly (by hand… you don’t want to pulverise the veggies!)

Now, I opted to spoon the solids (the kale, tomato & cheese) into the baking dish, to fill in the gaps between the broccoli florets … I guarantee if you try to pour the whole mix out you’ll end up with a pile of vege in one spot! Call me OCD, but I’m fairly sure it’ll cook better if the liquids & solids are evenly distributed. I dribbled the remaining egg mix evenly throughout the dish as well.

Food FervourThe final step is to grate however much extra cheese you want, over the top of the entire dish then whack it in the oven for 30-40 minutes (just check it at the half hour mark: when it appears quite solid in the middle, it should be ready).

Unless your knife is very sharp, I’d let it cool a bit before slicing it into pieces. And I dare you NOT to eat any when you do this… 😉

Pimped Up Egg ‘n’ Lettuce

I’ve always been a fan of egg and lettuce sandwiches but they’re really a bit average when you consider nutritional value. Sure, there’s super-healthy, protein packed egg but most of the time it’s been mixed with sugar-laden mayonnaise, on white bread. And poor old iceberg lettuce… well, its colour kinda says it all. There’s some water and fibre there but it otherwise doesn’t have a lot else going for it…

I’ve said before that it’s really worth pre-boiling up a few eggs and keeping them in the fridge for ’emergencies’ …or just days of pure laziness, such as I am having. This fine prepatory activity saved me a whole lotta time today. In fact, my lunch was ready in less than four minutes…Food Fervour

All I used was: 2 slices of rye sourdough (a fermented, flavoursome bread) 1 boiled egg, ¼ of a large avocado, 3 think slices of parmesan cheese (you could use any hard cheese but a sharp flavoured one will taste better) & a handful of baby spinach leaves.

Because I keep my bread frozen, I had to thaw them in the toaster …which gave me time to peeled the shell off the egg. Then it was a super simple assembly: avo spread thickly over both pieces, egg slices and laid on one, topped with the parmesan cheese (at this point you could, if you wish, chuck this under the grill to melt that cheese …mmm…) then carefully laid baby spinach (OK, OK, apart from sounding highly OCD, this actually helps you to fit more spinach on the sanger, so it’s less likely to fall out when you eat it. Uh-oh, another OCD statement…) Salt if you prefer, then pop the second slice on top, avo face down (did I really need to spell this out?) and Bob’s your uncle…. a delicious, healthier, more nutrient-dense version of an old favourite.

….that I probably wolfed down in less time than it took to make it… 😛

Asparagus & Eggplant Salad with Poached Egg

Time to use up some asparagus! Since it pairs well – and often – with poached egg, I was up for totally up for that today, but I wanted more variety. More veg. With one mini eggplant left in the fridge, I searched for “asparagus eggplant recipes” and found this one pretty quickly… it was quick and easy to boot.

Food Fervour

Here’s what I used:

1 small eggplant, 8 asparagus spears, 3 cherry tomatoes, 1 egg, apple cider vinegar, a handful of rocket, finely grated parmesan cheese, extra virgin olive oil (EVOO)

And here’s what you do:

Quarter the eggplant then slice approximately 5mm thick pieces. Rub the pieces with salt and let rest. Meanwhile chop and discard the bottom 3cm of the asparagus spears then slice into pieces approx 3cm long. Turn the oven grill on to high.

Set a small saucepan on the stove and fill with about 5-6cm water on high heat. Cover and while it comes to the boil, rinse the salt off the eggplant and pat dry with paper towel. Then coat it generously in oil (EVOO) and spread the pieces out under the grill.

Throw the asparagus in the boiling water (to blanch), removing with a slotted spoon after a couple of minutes. Don’t tip out the water, we’re going to recycle it! Set the asparagus aside and check the eggplant; it should be ready to turn over.

Return the saucepan with the water to the stove, adding a dash of apple cider vinegar. Break the egg into a small cup or bowl then, as the vinegar water returns to the boil, grab a spoon and begin stirring the water in one direction quickly to create a ‘whirlpool’. Tip the egg right into the eye of the whirlpool then remove the saucepan from the heat source immediately and cover with the lid. The egg will keep on cookin’ in this hot environment (about 3 minutes for the perfect soft centre) as you continue your prep…

Lay a bed of rocket on your plate, placing the asparagus over the top. Remove the eggplant from the grill and scatter on the plate, then add the quartered cherry tomatoes.

Using the slotted spoon again, gently remove the egg from the saucepan, resting briefly on some paper towel to drain excess fluid, then place on top of the salad. Shower the lot with the grated parmesan, drizzling some EVOO and seasoning with salt and pepper before chowing down. You could add a little vinegar or lemon juice as well if you prefer.

Food FervourIt’s a perfect ‘light meal’ ….but I was a little hungrier than I thought so I ended up cutting a few extra pieces of parmesan to nibble on while I cleaned up. 😛


Turnip Scrambled-Egg-Omelette

So I bought a turnip at the farmers markets a few weeks ago because I’d never cooked with one before (I’m doing this kind of thing a bit more of late) and then …forgot about it. But today was the day. And I was stoked to find a recipe that involved eggs …because I’d just done some weight training… perfect timing for a high protein meal.

As usual, I was compelled to tweak the recipe I discovered on the Amateur Gourmet (direct link here) because I wanted to use up a few other things as well as increase the meal’s nutritional density. I’ll admit from the get-go that my omelette failed …to look like an omelette that is. I’m not so good at making perfect omelettes mostly because I refuse to use non-stick cookware. I’d hoped I’d have more success with my porcelain coated frypan as opposed to the stainless steel ones I usually use but… it wasn’t to be. :/

Food Fervour

I used: 1-2 tablespoons extra virgin olive oil (EVOO), approx 1 tablespoon of butter, 1 peeled & coarsely grated turnip, ½ small capsicum finely diced, 1 small finely chopped garlic clove, 1 small finger of turmeric, 1 finely chopped shallot, 1 tablespoon tamari, 2 eggs, black pepper & sea salt.

Placing the frypan over a medium heat, I added the butter & half the EVOO and as it warmed I pressed as much fluid out of the grated turnip as possible, with paper towels. I added the turnip and cooked for about 5 minutes (occasionally stirring) before adding the capsicum, garlic and finely grating the turmeric into the mix. I let that lot cook, seasoning with the salt & pepper, for another 5 minutes, stirring occasionally.

Whisking the eggs with the tamari then adding the chopped shallots, I turned the heat down to low, before pouring the egg mixture over the vegetables in the frypan, tilting it to prevent the egg from running away from the veggie mix. After a couple of minutes I scraped the edges of the omelette (realising then that it wasn’t going to stay in one piece for me!) to loosen the egg from the base of the frypan, then I began to turn ‘chunks’ of the omelette over bit by bit, to cook for 2-3 minutes more. This is basically where it became scrambled eggs. 😛

I served it up with a piece of avocado toast, some fresh tomato and gave it a good sprinkling of nutritional yeast (my current obsession due to its high protein and B vitamin content, specifically folate (B9) and B12). I was surprised to find that, rather than overly salty, it tasted relatively sweet (that was definitely the capsicum). Needless to say I cleaned my plate. 😉

Black Beans & Quinoa ‘Casserole’

I’ve got a ‘thing’ for black beans lately. Maybe it’s simply because they seem to be in vogue at the moment, but what I keep thinking of is their colour: it’s almost a nutritional fact that the richest, deepest coloured plant foods seem to be the most nutrient dense. Also known as turtle beans, they’re a ridiculously good source of protein, fibre, some vitamins & minerals. So I have a very large jar of them in my pantry. Because I don’t buy tinned products, I don’t even know if you can get these fellas pre-cooked in Australian supermarkets; I mean, I’ve never looked. I prefer to DIY. Y’know, prepare ‘from scratch’.Food Fervour

Because they’re a relatively new to my repertoire, I’m not quite sure what to do with them. Mexican predominantly comes to mind when I’m pondering what to make, but I often just throw them into salads as well. This time however, I wanted warm comfort food …and quinoa. I’d noticed a few black-bean-and-quinoa recipes floating around the net in the past, so I was confident I’d find something I wanted. And I did: three recipes, all quite similar… so I literally flipped between windows/tabs during the cook.

Having previously soaked, then slow cooked (overnight) the black beans, they were now ready to go. (Unfortunately I can’t recall the dry weight I began with, however I was lucky enough to have the exact quantity required for the recipe(s!) ….250gms.

This makes an absolute tonne, so as a single person I got about 4-5 meals out of it… and it tastes great cold so you don’t need to reheat it every time you want some. I should imagine it would freeze well too if you’d prefer to do that.

The ingredients I used were as follows:
a good dollop of EVOO, 1 diced onion, 1-2 finely chopped garlic cloves, ¾ cup (well) rinsed quinoa, 1 teaspoon cumin, ½ teaspoon chili powder, 1½ cups vege stock, black pepper & salt to taste, corn kernels (I used frozen) 250gm pre-soaked & cooked black beans, 200gm baby spinach.

In a large saucepan (over medium heat) add the oil then the onion and garlic, cooking for about 3 minutes or until the onion softens.

Add the quinoa, blending with the oil, onion & garlic, then add the cumin, chili powder, vegetable stock and black pepper. Give it a mix, increase the heat and once it has come to a boil, drop the heat back to low, pop on the lid and let it simmer for 20 minutes. Give it an occasional stir (mainly to loosen anything sticking to the saucepan base).

Finally, add the corn, beans and baby spinach, stirring gently then covering again for about 5-10 minutes …however long it takes to warm the beans, wilt the spinach and thaw the corn (if using frozen, like me).

Food FervourTo serve, use your imagination! You could easily just hoe in as it is, but I like to add more nutrients, so I went with a ‘warm salad’ theme and topped my serve with chopped avocado, fresh chopped tomato and crumbled feta. For a Mexican feel you could substitute my idea with (home made!) guacamole, (homemade!) tomato salsa and grated cheese ….as well as bit of sour cream (oooh! I just realised this would make a delicious vegetarian nachos topping!)

The next day I ate a serve cold, topped with freshly steamed broccoli, more feta (!) and a boiled egg for extra protein (pictured above). Go crazy …and don’t forget to let me know what you create. 😉


Cauliflower Pizza Bases

Food FervourI was skeptical about this notion when I first heard of it. Could cauliflower really imitate a dough base and hold together under the weight of all those toppings? I had to try for myself. And I was completely surprised (and smitten) when I made my first one. Now I can’t look back. Whilst they’re neither a thin crunchy base, nor a thick chewy, doughy one, they do manage to hold together well enough to support all your toppings (and I usually pile on way more than you’d get in your typical takeaway pizza). They are…. amazeballs.

Why opt for cauliflower over grain-dough bases? My primary reason is because it’s a vegetable. Whilst I prefer not to demonise foods, I would choose a vegetable over a grain in this case purely for its nutritional content. In general veggies provide more nutrient density and variety. And then there’s the fact that cauliflower’s pretty much starch (complex carbohydrate) -free compared to dough, which matters if you are ‘watching your weight’. Finally, there’s the gluten issue: this is perfect for coeliacs or the gluten intolerant.

Food Fervour

Chopped fresh flat leaf parsley features in this cauliflower pizza base

And best of all, you only need – at the very least – TWO ingredients: cauliflower and eggs. Many cauliflower pizza base recipes will include more than two, but they really are optional: the vegetable and eggs on their own will work just fine …but it is fun to play around with add-ins. I’ve experimented with a few of the following: obviously salt & pepper, but also chopped/dried herbs, grated cheese, tomato paste and I just LOVE nutritional yeast flakes (idea borrowed from Lee Holmes’ Supercharged Food).

It’s such a simple procedure, however the success of your base will be largely determined during one specific step. Here’s the method, based on 500gm cauliflower and 2 eggs:

Pre-heat Oven to 200ºC and line a baking tray with baking paper. Set aside.

Steam Cauliflower florets:

Manually: In a medium/large saucepan, bring add approx 2-3cm of water to the boil over high heat (cover with the lid to expediate this or better still, add boiling water from a freshly boiled electric jug to a large saucepan on the stovetop, on high heat). Add the florets, drop the heat back to simmer and keep the lid on the saucepan. Your cauliflower should cook in 4-5 minutes (check softness with a utensil). Thermomixers: Add 500gm of water to bowl then place cauliflower florets in basket. Programme 14 minutes, Varoma, speed 1-1.5.

Remove Excess fluid from the Cauliflower (this is the crucial step):

Allow cauliflower to cool (you can rinse under cold water to expediate this). Drain all excess water from the florets then roughly chop or mash the cauliflower (in the same saucepan …to save on dish-washing). Thermomixers can simply chop at Speed 5 or Turbo for a few seconds). Empty it all into the centre of a clean cotton tea towel, then, pulling the sides up, begin to squeeze out as much excess water as possible …into the sink for drainage (or over a bowl if you like to conserve your veggie water). The volume of cauliflower will pretty much halve in size. The more fluid you extract, the firmer your pizza base will be.

The Ingredient Mix:

Food Fervour

Tomato (paste) pizza base spread with fresh basil pesto, ready for toppings…

Manually: Return the mashed cauliflower to a bowl (scraping the veggie fibre from the tea towel – waste not, want not!) add the eggs and whatever else you’d like to add to the base, and mix thoroughly. Thermomixers: pop it all into the bowl and blend up to Speed 5 for about 10 seconds (you may want to scrape down the bowl down in between?)

Shape & Cook:

Tip the mixture into the centre of the paper-lined tray, and use a spatula to shape your pizza base. Aim for about ½-cm in thickness.

Pop into the oven and cook for 20 minutes, earmarking to turn the base over at about the halfway mark if possible.

Toppings:

Use the 20 minutes base cooking time to prepare your toppings. I’ll often fry up some mushrooms, preservative free bacon, capsicum and/or zucchini… I’ll boil the electric jug again and blanche some asparagus or broccoli… or make some basil pesto to use as the pizza base spread. You can grate your cheese now as well, so that you’re one hundred percent ready to dress the base.

Food Fervour

Leftover lunch slice of bacon & mushroom pizza

Once the base is done, and your toppings are spread, pop the pizza back in the oven for 7-10 minutes. It goes without saying, you need to serve immediately …but I have successfully refrigerated uneaten portions to enjoy for lunch the next day, just as you might do with a commercial pizza.

These really are the Bomb! If you are in the Gold Coast region, you can book a FoodPT with me to watch me demonstrate this procedure (it’s one of my most popular classes) and you get to eat the results. Find my contact details on the ‘Menu’ Page.


An Eclectic Rainbow Salad

Variety is the spice of Life. It also happens to be really good for your body.

That’s why it’s one of the drivers behind the meals I make: the greater the variety of food in a meal, the higher its nutritional content (generally speaking). That’s why ‘they’ say “Eat a Rainbow”.

Well, today’s lunch certainly nailed the colour bit. Which is interesting, considering it all began with a thought about boiled eggs as I drove home from yoga. You see, I often boil a few up and keep them in the fridge (…for moments just like these – instant gratification meals). Mum used to make an avocado, tomato & cottage cheese salad that I loved and even though it didn’t relate directly to my egg craving, I began to envisage a meal based on this combination.Food Fervour

This is how it came together:

Scattering a large handful of roughly chopped baby spinach on my plate, I then topped it with 3 quartered cherry tomatoes, 2 quartered hard boiled eggs, about 5cm of chopped lebanese cucumber and chunks of flesh from ½ large avocado.

Next I piled on about 3 heaped tablespoons of (my homemade) sauerkraut to please my gut bacteria, then a mound (approximately 2 tablespoons) of grated vintage cheddar …simply because it goes so well with avo and sauerkraut (have you ever tried a Reuben’s Sandwich? Here’s a link to my recipe for one of them:

A Probiotic Toastie?

)

That’s kind of edgy enough for a salad but I felt like pushing the boundaries a bit further so, instead of my standard vinegar & oil dressing, I drizzled the plain EVOO (extra virgin olive oil) over everything but followed it with a dollop of homemade sweet chilli sauce on the top. And if that wasn’t daring enough, I sprinkled approximately a dessertspoon of nutritional yeast flakes over the whole lot. BOOM. Gut-lovin’!

Now admittedly, even before I tucked in, it crossed my mind that I might’ve gone too far: gone overboard with elements & confused the flavours …but I wasn’t disappointed. I ate the lot. Maybe I was too hungry to notice whether the flavours really worked together or not? So please, by all means, if you decide to try this meal for yourself, and you come to a different conclusion, feel free to remind me that sometimes nutrient density should take a backseat to simplicity…

French Toast Sandwich aka Cheat’s Pancakes

I usually opt for pancakes for Sunday brunch but today I was feeling a tad lazy (hey, I’ve been up since 5am surfing, cleaning & gardening… I’m entitled!) so what to do if you feel like pancakes but you can’t be bothered to make the batter and cook them?

Grab two slices of bread and an egg. French toast is dead simple and much quicker and easier to create than pancakes. All I needed to add was some elements for extra flavour, nutrient density and excitement…

So this is how it came together:

Since I keep my (variety of) breads in the freezer (pre-sliced) I had to pop two pieces in the toaster to thaw for a few seconds, so in the meantime, I set the frying pan on the stove on a medium-low temp, adding a splash of coconut oil. Setting the bread slices aside I then created the French toast batter by whisking together an egg, a dash of milk, a teaspoon of vanilla paste and a decent sprinkling of cinnamon in a cup.

Placing the two bread slices in the pan, I carefully poured about half of the egg mixture (that’s a quarter for each slice of bread) as evenly within the bounds of the crust of both pieces as possible, and after about a minute, turned them over with an egg slide to cook. Note: this method is actually a tad more difficult than your typical French toast procedure: normally you’d empty the egg mix into a shallow dish and soak the bread pieces before putting them in the frypan. My fiddly method keeps your crusts ‘crunchier’…

Next I grabbed a handful of hazelnuts, a dash of maple syrup, some more (rice) milk and cacao powder to make my hazelnut choc sandwich filling. Some minutes in the Magic Bullet – stopping regularly to check consistency and scrape down the sides – and that was done. Ready.

Returning to the pan, I divided the remaining egg mixture carefully again over the (other sides) of the bread slices, spreading the dregs of the mix (chunks of vanilla bean at the bottom of the cup) over the toast as well (waste not want not and …extra fibre!) before turning them for the last time.

While the second side cooked I grabbed my plate, then the tub of greek yogurt  and some fresh blueberries from the fridge…. ready to rumble! Once the toast was browned enough on the second side, I popped it on the plate, smearing a nice thick layer of the hazelnut choc mix onto one piece before topping it with the other slice. Dropping a couple of large dollops of yoghurt on top of the ‘sandwich’, I scooped the rest of the hazelnut spread on top and swirled them together with the end of the fork. Then it was simply time to pile on the blueberries, and get stuck in! Mmm, craving satisfied.Food Fervour

It was so rich that I know I won’t be able to eat again for many hours. To be honest, I think coconut cream (even though it may melt due to the meal’s warmth) may taste better than the yoghurt: while it’s good for some tartness (and probiotic qualities!) it’s somehow not quite complementary. If you decide to give this creation a go, let me know what you used and how it turned out 🙂


Eggs Are the Bomb!

One of the things that stuck with me from my very first Nutrition module in my Fitness training was learning that eggs have the highest Biological Value to humans… which basically means the protein in them is more ‘complete’ and better utilised by our bodies, compared to other sources like milk, meat and plant-foods. (I’ve since discovered that whey protein tops eggs but who really wants to consume a processed macro-nutrient? Naaaht me!)

This made me, as an egg-lover, happy. And since that day I have always maintained that if I were only allowed to live on ONE (animal-based) source of protein for the rest of my days, egg it would be.

Well, I just came across this little beauty on the site Science Alert, that lifts the value of the humble egg even further in my eyes: consuming them with raw veggies (that is… salad!) helps to increase valuable nutrient absorption…how GOOD is THAT?!

There’s one proviso though: it has to be the whole egg. The yolk is by far the most valuable part of this whole-food, so if you’re an egg-whites-only consumer, I’m sorry but you’ll dip out on the complete benefit. And, it almost goes without saying… choose organic where possible…

Apparently natural oils used as/in salad dressings aid absorption too, but the article seems to indicate portion control – combined with protein presence – is what makes eggs the superior choice.

Take a look at the article: here-s-how-eggs-can-super-charge-your-salads

Food Fervour