Monkey Bread Breakfast

While Sunday seems like the right day for decadence, I’m really not sure my breakfast this morning fits the bill. It’s so ridiculously dessert-like that I’m… I’m almost feeling… guilty.Food Fervour

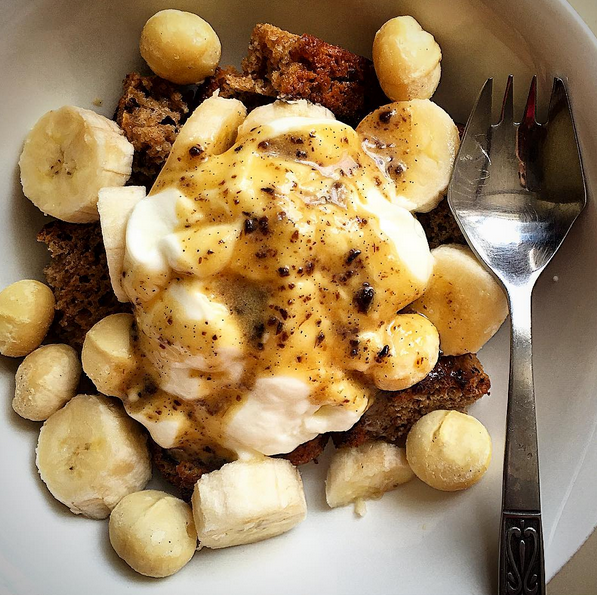
You see, yesterday I decided to try a recipe for something I’ve never (to my knowledge) eaten before: Monkey Bread. I’d been preparing my spelt sourdough from Jo Whitton’s Quirky Cooking, when on a whim, I decided to keep on cooking …I had the time and the ingredients (kind of)… and I chose her to try her monkey bread.

As with many of my yeast-based bread attempts, it didn’t seem to turn out the way it should have …according to photos of other Monkey Breads I’ve seen. But then, I did make a couple of small adaptations: I halved the quantities (that shouldn’t’ve mattered) added cinnamon to the dough (this neither) and finally used maple syrup in the ‘butter sauce’ instead of solid sugar granules (like rapadura or coconut sugars). That most certainly could have had some effect on the outcome. But I tell you what, I don’t regret it because I had a bit left over, and it was an integral element of my wicked breakfast today.

Suffice to say, it still tasted good (and I only ever throw out totally inedible foodstuffs) so after it had cooled right down, I cut it into slices and shoved it in the freezer for future consumption. No surprise that it ended up on my mind this morning. At first I envisaged trying to make French toast with it but laziness kicked in, and I opted for super simplicity: toasting (in the griller). No frypan to wash up, you see. 😉

It came together with just the following ingredients: two slices of monkey bread (you could use banana bread or slices of some other sweet loaf) one banana, a ‘scattering’ (small handful) of macadamia nuts, 2-3 heaped tablespoons of Greek yoghurt and about a tablespoon of the leftover vanilla-butter-maple syrup sauce (you could of course substitute with straight maple syrup, but you definitely will not need a whole tablespoon; try 2 teaspoons) (FYI, the ‘black bits’ in the sauce in the picture above are fragments of vanilla bean from my homemade vanilla paste.)

Toast the bread in the grill, whilst slicing up the banana. Break the toasted bread into chunks in your bowl, scatter over the banana slices and macadamias then top with the yoghurt. Finally drizzle over your sauce/syrup. You could scatter some berries on top as well for a burst of freshness (this came to me after I’d emptied the contents of the bowl into my body, dammit!)

If you give this a go, please let me know what you think: breakfast or dessert? 😉

Gluten Free Fruit & Seed Loaf

food fervour

Raisin toast is loaded with sugar so I need to create a GF version minus excessive added sugar…

I used to have a real weakness for fruit toast. But I knew before I went off gluten that fruit loaves are full of sugar so I began limiting my ‘splurges’ anyway.

But I do miss ‘raisin toast’ from time to time, so my quest is to try to create a gluten free version that’s as similar to the ‘real thing’ as possible, minus the excess sugar of course. Trial and error is the only way, with the aid of heaps of research – Googling & others’ blogs! – and the courage to ‘alter’ (or ‘bastardise’ as I like to say) recipes. That kind of courage I definitely do not lack.

The loaf I just made was the result of an adaptation of Cyndi O’Meara’s gluten free bread recipe included a couple of Thermomix recipe books. I altered the dry ingredients a fair bit (due to both lack of some & preference for others), added a selection of spices, seeds, preservative-free dried fruits (these worked to sweeten the loaf more than the meagre amount of coconut sugar I opted for) and the kicker: I replaced xanthan gum & egg with soaked chia. I’d discovered this idea on a blog somewhere recently and then saw it used in a complimentary recipe on the Thermomix website.

food fervour

served up warm with my homemade butter

So… it turned out heavier than your typical commercial wheaten fruit loaf, but toasted up, I think it made the grade: particularly considering the vast majority of ingredients I used were unprocessed, which as far as I’m concerned is the most important thing.

If you don’t have a Thermomix the recipe should still work (you’ll have to buy your flours pre-milled) but will involve a lot more elbow grease in the mixing stages! Here’s what I used this time around:

2 tbspn chia seeds, 8 tbspn water, 280gm whole buckwheat, 100gm brown rice, 40gm dried chickpeas, 1 heaped tspn whole cloves, 35gm cornflour, 1 tspn cinnamon, 1 tspn nutmeg, 1 tspn garam masala, 10gm instant yeast, pinch (Himalayan) salt, 20gm coconut sugar, 400gm lukewarm water, 30 gm macadamia oil, 1 tspn vanilla essence, 1 tbspn apple cider vinegar, 80gm chopped dates, 80gm sun raisins, 45gm pumpkin seeds (pepitas), 40gm sunflower seeds.

Firstly I put the chia seeds and 8 tbspn water in a jar, shook it up and left it to ‘absorb’ while milling the buckwheat, brown rice, chickpeas & cloves in the Thermomix (1 minute, Speed 9). I added the remaining dry ingredients (cornflour, the powdered spices, yeast, salt & coconut sugar) and mixed lightly (15-20 seconds, Speed 4-5) before adding the water, oil, vanilla, vinegar and chia seed gel for another 15-20 seconds on Speed 5-6. I finally added the dried fruit & seeds, mixing gently on Reverse, Speed 1-2 for 20-30 seconds (to be honest, I can’t recall how long). Ready to empty the ‘batter’ into my greased & lined loaf tin, I placed it directly into the cold oven so it could ‘prove’ for the 15-20 minutes it takes to heat up to 180Âș. (The appliance in my rental home is ‘ancient’ & even though it is fan-forced, it’s pretty ‘slow’.) So from go to whoa, it should take about an hour: 20 minutes proving + 40 minutes cooking @ 180ÂșC.

Don’t expect a sweet cake-loaf: as I said earlier the meagre amount of coconut sugar is literally swamped by the other ingredients. So much so that the next time I cook this (or something similar) I’ll leave it out altogether and simply up the dried fruit content. Oh and nuts, I’ll definitely add chopped nuts. I’ve also read that the longer the dough (in this case ‘batter’) proves the better, so next time I might let it sit for longer before turning the oven on
 I’m not sure if this applies to heavy gluten-free-grain-and-seed-floured doughs but if someone out there knows, please speak up!