3 Ingredient ‘Chocolate Ganache’

Ok so how I came across this one was …kind of like the movie ‘Sliding Doors’. And I realise that won’t mean anything to those who haven’t seen it. But basically, it was by accident, and yet also a ridiculously close ‘shave’. Let me explain:

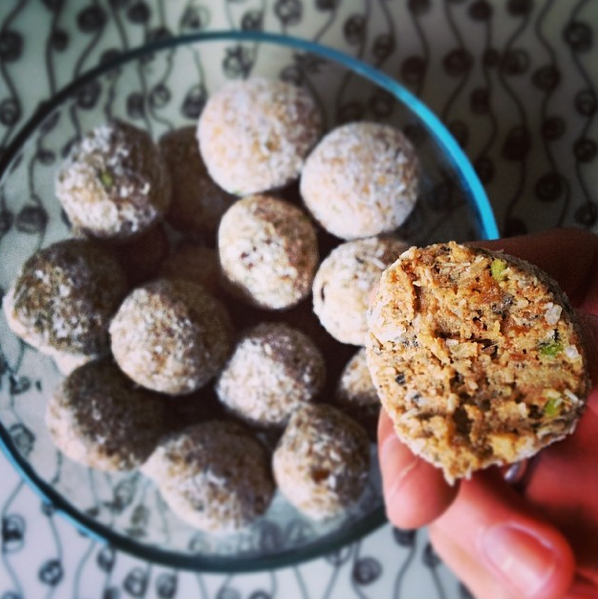
When I began making ‘raw cookies’ about a decade ago (before they became the energy/protein balls or raw truffles we all know today) I soaked dates. Yep, just that. I soaked dates, as the basis for these healthy raw food treats. You would blend them up (but because I never had a blender, I just chopped them over and over again until they resembled something a food processor or blender might spit out) then mix milled or chopped nuts, seeds and whatever else into them before the messy part of the job: the hand-rolling and coating in   desiccated coconut or again, nut meal.Food Fervour

It was when I came across a recipe that included cocoa (yes, before cacao powder went ‘mainstream’) that I realised soaked dates mixed with cocoa could make a kind of (weird) chocolate substitute. But this is where the train doors slid shut…. and I forgot about it.

…Until last year sometime, when, after making another slightly dry (I admit!) gluten free cake that I knew would benefit from some kind of moist topping (but what to make without heaps of processed sugar?) the train doors automatically opened and I soaked some dates. It worked perfectly – for ME: I realise chefs and food critics would turn up their noses, but I’m not about perfection (at the cost of health).. I’m about clean, unprocessed Imitation & Adaptation!

This is extremely easy but you’ll need to allow more time: the longer the dates soak, the better. In fact, if the dates are well soaked and chopped, you don’t even need a blender for this recipe; some old fashioned elbow grease (mixing by hand) will work. Oh and make sure there are no seeds in them!

One cup of dates (I use Iranian, I imagine Medjool would work even better, and may not need to soak for long – if at all. Please let me know how this goes if you try this!) will easily thickly coat a loaf-sized cake, with some to spare.

Food Fervour
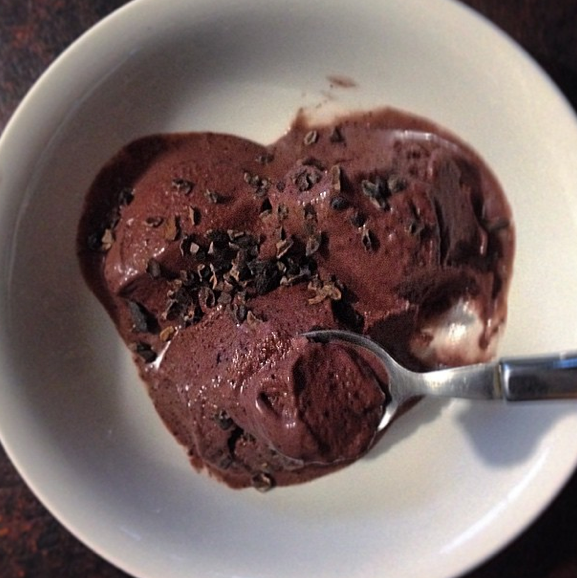
Drain the water from the dates (I actually keep this to use as a liquid sweetener in other creations: waste not, want not!) and throw them in a powerful blender with 2 heaped tablespoons of cacao powder (add more for a stronger dark chocolate flavour) and 2 tablespoons liquefied coconut oil. You will need to blend & scrape numerous times (Thermomixers, I performed about 4 rounds of 15 seconds, increasing from speed 5 to 9) but the result is worth it: a rich, thick, chocolatey ‘ganache’ that you can top cakes with, fill biccies with, or even eat on toast like Nutella (if you’re desperate enough)! If you really want to you could press the ganache through a strainer to ensure a smoother product, but for my money, what’s the point in removing all that extra natural fibre?

Food Fervour

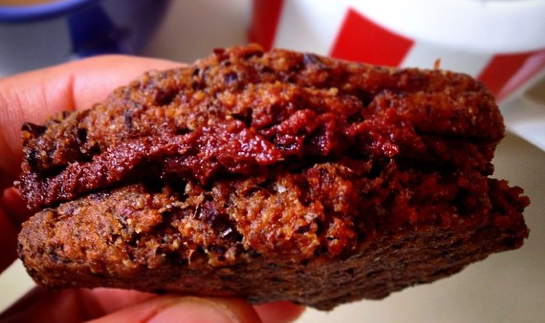
‘Ganache’ used as a biscuit filling

There’s heaps of room to experiment too: powdered spices or essences could alter the result… Vanilla or peppermint essence? Cinnamon? Even a touch of chilli powder? I think I might try to explore a salted caramel version so… stay tuned for that!

Vegan Anzac Cheesecake

How the heck did I come up with this one?

Easy, really. While searching for a traditional Anzac biscuit recipe earlier in the week, I came across a recipe for an Anzac Cheesecake… a traditional, cheesy cheesecake. Since I love the raw cheesecake phenomenon, I instantly mulled over what ingredients I would use, to get the flavour of an Anzac biccie.

And what better tribute on this, the 100th Anniversary of the landing at Gallipoli? (For anyone outside of Australia or New Zealand who may not know what this means to us, take a look at this postFood Fervour

So where to start? Well, the traditional biscuits are primarily comprised of oats, flour, sugar, desiccated coconut, golden syrup (‘treacle’), butter and the result is a wonderful ‘caramel’ flavour. I could envisage the oats & desiccated coconut in the cheesecake base (sorry, this isn’t gluten free people: but you could easily substitute almonds or buckwheat instead) but what about the cheesy filling?

Well, raw foodies know that nuts can make great dairy substitutes, and almost every raw cheesecake recipe you find will use cashews for the filling. I like to buck trends sometimes. And this HAD to be an Aussie recipe. There was no better option than our native nut, the macadamia. Coconut cream and/or oil would work because coconut figures in the original biscuit recipe. The ideas flowed from there…

There are three stages to the cheesecake’s creation, and since one does involve cooking, I can no longer claim this as ‘raw’. Firstly, I made a salted caramel sauce (recipe sourced from Quirky Cooking – see here) then created the base, and finally the macadamia/coconut cream/salted caramel filling. And I was blown away by the result!food fervour

Please note: using a standard springform cake tin, I found that my cheesecake was rather flat which indicates I my quantities were too few. Having said this, I’ve decided to supply my original amounts anyway but I highly recommend you used a smaller dish… or double all the ingredients! (If you do that, can you let me know how it works out please?)

For the caramel sauce I used 50gm coconut sugar, 50gm coconut cream, 1 teaspoon vanilla extract & a good pinch of Himalayan Salt.

I put all of these in the Thermomix for 3mins @ 100º, speed 2. For those without this piece of equipment, I apologise but I can only guess that you would add all the ingredients into a small saucepan and stir continuously (probably for more than 3 minutes I imagine) until the mixture thickens. (Be careful you don’t let it go too long, it will burn quickly. But then, burnt caramel is another flavour in itself, and maybe it could work?!) Empty into a jug or cup and set aside.

For the cheesecake base I blended 1 cup of dates, ½ cup oats and ½ cup of desiccated coconut until fully granulated (Thermies up to 15 seconds, speed 9-10). Grease your dish with coconut oil, tip the base mixture in and using a spatula (or clean hands?) press firmly and evenly across the base. Place it in the refrigerator.

For the filling I played around a fair bit! But in the end I used: ¼ cup of the prepared salted caramel sauce (that’ll be almost the whole lot), 1 heaped cup of (approx. 250gm) macadamia nuts, ½ cup coconut cream, ¼ cup coconut oil.

Firstly, I milled the macadamias (Thermies 10sec, speed 9-10) then added the sauce, blending for about 10secs, from speed 5 increasing to 9) Next add the coconut cream and Thermomix or not, you’ll need to blend a few times, stopping to scrape down the sides. My thought was, the more you blend, the better the aeration of the coconut cream, as well as further milling the macadamia particles. Finally add the (liquified) coconut oil, and I let this one go at speed 9 for almost 40 seconds.

Pour the thick filling into your prepared base dish, then simply freeze. I left mine overnight so I would highly recommend you leave it for at least one hour. It may stick fast to the base of the dish so gently warm the base (melting the coconut oil you greased the dish with) and it should come out with a little more ease.

food fervourI garnished the finished product with a crumbled Anzac biscuit (I also make vegan versions of those) but leftover salted caramel sauce drizzled over the top is divine!


Cacao Blueberry ‘Ice Cream’

food fervourIn case you haven’t gathered by now, I’m a bit of an ice cream fan. I used to be crazy for it and, while I can still ‘slide’ back into the habit of buying commercial stuff (whether it be a small tub from the supermarket, or a few scoops from a gelati shop) on the odd occasion, I’ve become pretty well disciplined to experiment at home when the desire arises.

It’s actually quite surprising how easy it can be. If you have nuts (& a range of spices) in the pantry, a heap of ‘stuff’ in the freezer and a very powerful blender (mine’s a Thermomix) you can have ice cream in minutes; ice cream will be way better for you than any mass-produced product out there and that should easily satisfy a ‘craving’.

I’ve come across a wide variety of recipes for ‘alternative’ ice creams with the help of Google, so if you want to experiment further do a little research on the net. The most astonishing recipes I came across were for vegan ice creams made entirely from nuts… which really did work! Fat is the key to ice cream however, having said that, some fruits (particularly banana and mango) when frozen thicken beautifully in the blending process.

Drawing on these ideas, along with some others I’ve gained through the Thermomix community, I created this no-added-sugar “ice cream” with a handful of all-natural – mostly frozen – foodstuffs. I have an almost permanent store of frozen fruit and yoghurt cubes in my freezer, which means I’m well prepared to make ice cream at the drop of a hat. Now, if you don’t like yoghurt you can try freezing cubes of coconut milk (vegan option) or perhaps even ordinary cow’s milk (I’ve never tried this), but creams (dairy especially) tend to split when frozen so they’ll affect the texture of your finished product.

food fervour

ready-to-freeze yoghurt

Forewarning: don’t expect the smoothest ice cream texture (because of the extra, natural, ‘great-for-your-gut’ fibre in it) and it definitely isn’t as sweet as your commercial counterparts…

Armed with 20gm hazelnuts, 4 dates, 1 frozen banana (cut into chunks), ½ cup frozen blueberries, 100gm frozen yoghurt cubes (approx 8) 1 heaped tablespoon of cacao powder and 1 teaspoon vanilla paste (optional) I created a taste sensation that could have served 2 people… but I ate the whole lot!

Place the hazelnuts and dates (try more than 4 if you are a real sweet tooth) in a high powered blender and blast until the nuts become ‘meal’ (Thermies: 10 seconds, speed 9-10)

Scrape down the sides of the jug/bowl then add the rest of the ingredients: banana, blueberries, yoghurt/milk cubes, cacao & (optional) vanilla. Blend until smooth. This may take 2-3 rounds: repeat blending, stopping, scraping down and mixing a little by hand. (Thermies: I started around Speed 5 and worked my way up to Speed 9 over a 30 second period, stopped, scraped down & mixed then hit it again at Speed 9 for another 30 seconds)

It should be solid enough to dish out in balls that look like huge scoops of ice cream. I topped mine with cacao nibs (coz I love chocolate chip ice cream) and devoured it in a matter of minutes.

food fervour

Believe it or not, this is a ‘kale’ (& mango) ice cream, I made from a green smoothie base. 10/10 for imagination?

Let me know how you go, and please feel free to share your variations or own personal experiments 🙂

Raw Carrot Cake with Lime Cashew Icing

I’ve had this recipe earmarked to try for quite some time now… but it was only this week I found the (time &) motivation. Included in a handout from a raw food demonstration I attended years ago, I’d filed it away in a cooking folder, to sit idly waiting for me to visit it.

food fervourWell, this week, it was Time. And I was impressed with the result. As usual, I made a few alterations to the original recipe (including halving all the amounts) and I believe there is yet more room for improvement!

Apart from a powerful blender (I used my Thermomix and later, to fine tune the icing, the Magic Bullet) you will need:

1 cup brazil nuts, 5 medium carrots, ¼ cup dates, ¼ cup maple syrup (I actually used ‘date water’ which isn’t as sweet as the syrup so you may find you could reduce this amount) ½-1 teaspoon grated ginger, 1½ cups desiccated coconut, ¼ sultanas, 1½ tblspns psyllium husk

Mill the brazil nuts first (TM: 10secs, speed 9) and set aside, then grate the carrots (TM: 10-15secs, speed 5-6). Next, blend the dates, liquid sweetener & ginger (TM: up to 30secs, speed 7-9). Finally, add in the nut meal, carrots and remaining ingredients and mix well (TM: approx 1min, speed intermittent (knead) scraping down then mixing 30secs, reverse speed 4). Empty the mixture into into a greased (coconut oil) lined dish (the mixture perfectly filled a 15 x 20cm stoneware baking dish I have) pressing it in and smoothing it over. Refrigerate, or freeze if you prefer.

For the icing, mill ½ cup raw cashews (TM: 10 secs, speed 9) then add approximately 2-3 tablespoons of maple syrup (again, I used date water instead) the flesh & rind of half a lime and a dash of coconut oil. Blend well (TM: 30-60secs, up to speed 8. You will need to scrape down a few times. This is where I transferred the mixture to my Magic Bullet short cup for a smoother consistency). Simply spread over the top of the ‘cake’ and refrigerate (or freeze) until ready to devour!


Liquid Health: Pros & Cons of Smoothies

I just gorged on cheese. I felt like some cheese on toast for lunch but thanks to my relationship with ‘instant gratification’ I started hoeing into the Nimbin Natural before my GF bread was toasted. Then I had a couple more pieces while the griller took its turn. So by the time I’d eaten, I was full as a goog (Aussie slang for “I’ve had sufficient”).

Now, with the stomach juices working hard (& loud!) I’m feeling a tad guilty about the lack of fibre & nutritional variety in that ‘meal’. Since there’s no way I could fit a whole salad in after all that (a sign in itself…) I’m going to ‘supplement’ with a smoothie.
Good old smoothies!
How did we ever live without them before? Nutrient-dense meals-on-the-run.
They are SO easy. So ridiculously easy. And they’re a blank canvas for the Creative. The one basic ‘rule’ I can ever recall hearing somewhere is:
60% FRUITS + 40% VEGGIES/GREENS

food fervourOf course, when you get used to them (that is, when you “harden up”!) you may find you can reduce the fruit component, which is a good thing for those who want to ‘control’ their fructose intake. Intensely flavoured components of a smoothie can disguise less palatable ingredients. If you have some idea of what fruits & vegetables go well together, you’re unlikely to go too far wrong. If all else fails… Google. There are literally thousands of recipes out there in the ether.

For this one I grabbed an orange, lots of strawberries & blueberries, a banana and a couple of dates and blended them with a chunk of cucumber, a stick of celery (leaves’n’all) a handful of baby spinach and some cabbage.
I blended the solids first to break them up as much as possible, then added my liquid (coconut water in this instance) for a smoother drink.

food fervour

So full… More for later!

The thing to remember with smoothies (and here I hark back to the ‘sign’ I mentioned during my cheese story) is that by liquefying your food, it’s easier to consume more than you need, plus there’s less work for your digestive system to undertake. While that can seem like a good thing  – and it can be when you are unwell and need all the energy (& nutrients) you can get for minimal effort, while your immune system is hard at work – healthy peops are likely to become hungrier sooner (despite ingesting a salad bowl’s worth of calories). Because your digestive organs aren’t really getting the ‘workout’ for which they were designed. They need the challenge of some tough fibre or dense proteins to breakdown in the same way your body responds to the fitness challenges you (should) apply to it in training!

To this end, I don’t believe smoothies should be consumed on a regular (daily) basis. After all, human evolution didn’t involve electric blenders!

For a meal on a run, yes – if you really CAN’T make the time. For instant gratification, yes, if you really CAN’T exercise self control. And heck, even for the occasional ‘nutrient supplementation’ after a very average meal (to wit: me, today) and at the expense of excessive energy intake!


Raw Passionfruit Avocado Cheesecake

I’ve been admiring (& occasionally enjoying) the variety of raw cheesecakes that are slowly becoming more readily available at cafes and eateries, but had not bothered trying to make one even though I’ve been told many times that it’s ‘piece of cake’ (excuse the pun).

food fervourMy love of avocado has extended beyond its nutritional value because I’m now aware of its other ‘superpowers’! My first experience came with a green smoothie recipe. My how stuff ‘thickens up’ when you add this little dude to the mix! I noticed raw mousse recipes relied heavily upon avocado as well. That got me thinking about the texture and consistency of cheesecake.

Now I’m certainly by no means a pioneer in the avocado cheesecake world, but I can say it’s hard to find many raw cheesecake recipes on the net that employ ‘avos’ as the primary ingredient, which would indicate there’s heaps of room for experimentation. The vast majority use blended cashews as the ‘cream cheese’ base. I thought avocado would work because it’s naturally bland on the palate, but the PERFECT creamy texture.

Passionfruit isn’t necessarily a real favourite of mine, but they have been in season and moreover, they have a strong flavour …and a ‘tanginess’… which is what you find in an ordinary cheesecake. So I grabbed me some of ’em and got crackin’.

All 3 attempts were well received by a variety of tasters, but the last version was the best and it’s simply because I upped the amount of passionfruit. The stronger the fruit flavour, the better. But if you are going to play around here, I’ll just remind you that the more fruit, the more ‘wet’ the mixture = the less well the final product will set or hold together. (Think of fruit with maximum flavour, minimal moisture…)

I used macadamia nuts for the base (borrowing from a recipe from Jo Whitton’s Quirky Cooking blog) because I always associate them with the tropics (and passionfruit’s definitely tropical) but almonds worked fine in my initial experiment so be creative if you like!food fervour

For the Base you will need: 130gm macadamias, 70gm desiccated/shredded coconut, 8 dates & a pinch of Himalayan salt

Simply blend everything thoroughly in a high powered blender (Thermomixers 20 seconds @ Speed 9) then press the mix over the base of a well-oiled (coconut oil is best) springform cake tin. Note: this will make a thin base – if you like thick cheesecake bases I recommend you double the ingredients. Set aside (or refrigerate in warmer climates).

For the Filling, you will need: 2 large (or 3 small) avocados, 4-5 passionfruit (depending upon how strong you’d like the flavour) 4 tablespoons maple syrup or coconut sugar, 4 tablespoons (approx 60 gm) coconut oil (melted), 2-3 teaspoons vanilla paste, optional 1 banana &/or ½-1 teaspoon grated ginger

Again, this is simply a blending exercise. (Even with a Thermomix I found myself stopping and starting, to check consistency & taste and scrape down the mixture) Start with the avocados, sugar/syrup, vanilla & if using, the banana/ginger. Blend well (Thermies approximately 20 seconds, Speed 5) Add the passionfruit pulp, blending until smooth (Thermies 20 seconds, Speed 5 & you may use Reverse speed so the passionfruit seeds aren’t pulverised initially). Finally add the coconut oil blending well again (Thermies 20 seconds, Speed 9 gradually)

Empty the filling over the base, smoothing off as evenly as possible, then allow to set in the refrigerator for at least 20 minutes (or the freezer if you can’t wait that long!) Then serve and enjoy 🙂


Gluten Free Fruit & Seed Loaf

food fervour

Raisin toast is loaded with sugar so I need to create a GF version minus excessive added sugar…

I used to have a real weakness for fruit toast. But I knew before I went off gluten that fruit loaves are full of sugar so I began limiting my ‘splurges’ anyway.

But I do miss ‘raisin toast’ from time to time, so my quest is to try to create a gluten free version that’s as similar to the ‘real thing’ as possible, minus the excess sugar of course. Trial and error is the only way, with the aid of heaps of research – Googling & others’ blogs! – and the courage to ‘alter’ (or ‘bastardise’ as I like to say) recipes. That kind of courage I definitely do not lack.

The loaf I just made was the result of an adaptation of Cyndi O’Meara’s gluten free bread recipe included a couple of Thermomix recipe books. I altered the dry ingredients a fair bit (due to both lack of some & preference for others), added a selection of spices, seeds, preservative-free dried fruits (these worked to sweeten the loaf more than the meagre amount of coconut sugar I opted for) and the kicker: I replaced xanthan gum & egg with soaked chia. I’d discovered this idea on a blog somewhere recently and then saw it used in a complimentary recipe on the Thermomix website.

food fervour

served up warm with my homemade butter

So… it turned out heavier than your typical commercial wheaten fruit loaf, but toasted up, I think it made the grade: particularly considering the vast majority of ingredients I used were unprocessed, which as far as I’m concerned is the most important thing.

If you don’t have a Thermomix the recipe should still work (you’ll have to buy your flours pre-milled) but will involve a lot more elbow grease in the mixing stages! Here’s what I used this time around:

2 tbspn chia seeds, 8 tbspn water, 280gm whole buckwheat, 100gm brown rice, 40gm dried chickpeas, 1 heaped tspn whole cloves, 35gm cornflour, 1 tspn cinnamon, 1 tspn nutmeg, 1 tspn garam masala, 10gm instant yeast, pinch (Himalayan) salt, 20gm coconut sugar, 400gm lukewarm water, 30 gm macadamia oil, 1 tspn vanilla essence, 1 tbspn apple cider vinegar, 80gm chopped dates, 80gm sun raisins, 45gm pumpkin seeds (pepitas), 40gm sunflower seeds.

Firstly I put the chia seeds and 8 tbspn water in a jar, shook it up and left it to ‘absorb’ while milling the buckwheat, brown rice, chickpeas & cloves in the Thermomix (1 minute, Speed 9). I added the remaining dry ingredients (cornflour, the powdered spices, yeast, salt & coconut sugar) and mixed lightly (15-20 seconds, Speed 4-5) before adding the water, oil, vanilla, vinegar and chia seed gel for another 15-20 seconds on Speed 5-6. I finally added the dried fruit & seeds, mixing gently on Reverse, Speed 1-2 for 20-30 seconds (to be honest, I can’t recall how long). Ready to empty the ‘batter’ into my greased & lined loaf tin, I placed it directly into the cold oven so it could ‘prove’ for the 15-20 minutes it takes to heat up to 180º. (The appliance in my rental home is ‘ancient’ & even though it is fan-forced, it’s pretty ‘slow’.) So from go to whoa, it should take about an hour: 20 minutes proving + 40 minutes cooking @ 180ºC.

Don’t expect a sweet cake-loaf: as I said earlier the meagre amount of coconut sugar is literally swamped by the other ingredients. So much so that the next time I cook this (or something similar) I’ll leave it out altogether and simply up the dried fruit content. Oh and nuts, I’ll definitely add chopped nuts. I’ve also read that the longer the dough (in this case ‘batter’) proves the better, so next time I might let it sit for longer before turning the oven on… I’m not sure if this applies to heavy gluten-free-grain-and-seed-floured doughs but if someone out there knows, please speak up!


Dessert for Breakfast

So there’s this Thermomix recipe that I’m in love with. It’s classed as a ‘breakfast’ dish, but to my mind, it’s TOO luscious and (here comes the Health Nazi) not really packed full enough of nutrients to constitute an everyday healthy meal. (I’ll talk about my typical breakfast choice another time.)

But it’s Sunday. And while I am waiting for my first attempt a gluten free fruit loaf to cook, I have to put something in the belly.

food fervour

The first time I made CADA I fell in love with it

CADA stands for Coconut, Apple, Date & Almond. It’s incredibly simple. You throw all of these ingredients in and Turbo a few times. Voila! The recipe asks for coconut flesh which personally I never have on hand, so my version replaces it with shredded coconut after the mix hits the serving dish. Then I add cinnamon and thick greek yoghurt and I swear it’straws just like eating apple pie with cream. Or apple crumble. Kind of.

food fervourToday I dropped the coconut in favour of some strawberries. For this single serve, I used ½ a green apple, approx 30gms (6-8) dates, 35gm roasted almonds and a handful of fresh strawberries. I’d recommend (Thermie user or not) you blast the almonds, dates and apple first then add the strawberries for the final ‘wazz’ since they’re too soft to withstand a heavy beating. Topped with 2 substantial dessertspoons of Greek yoghurt and about a teaspoon of coconut sugar, it was to die for! Next stop will be the blueberry version….

Green Smoothies Don’t Have to be Green…

Take this for example:food fervour

In fact, I’d say most of the green smoothies I make are brown. Because I LOVE cacao. Why not have a chocolate flavoured smoothie if you have the choice?

Cacao is the raw form of cocoa and therefore even more nutrient dense. And its (delicious) strong flavour helps disguise the bitterness that many kale varieties posses. The smoothie I just made (pictured) had 4-5 kale leaves in it and it only took 2 heaped tablespoons of cacao powder (oh ok, and the dates) to camouflage the acrid (but oh-so-healthy) green.

You really can have a lot of fun experimenting with green smoothies. If you are new to them, work off the ratio of 60% fruit to 40% greens until you acquire a taste.

For this particular smoothie (it made enough for two, by the way) I threw 2 bananas in the Thermomix, with 4-5 de-stemmed kale leaves, about 2 heaped tablespoons of cacao powder, 4-5 dates, a handful of (frozen) blueberries and approximately 300mls coconut water and blended it all on for about 40 seconds on Speed 9. For non-Thermies, blend for as long as you need to on the highest speed (to really break down the dates and kale).

I shouldn’t have any muscle cramps for the rest of the day, with the amount of magnesium (thanks to the Cacao & coconut water) in this drink. 😉

Walnut, Apple & Cinnamon Coconut Balls

I’ve got a few organic green apples building up in my fridge and since I promised the Manager of Eden Health Retreat (where I work as a Fitness Therapist) a treat this week, I’ve put on my creative thinking cap. Apple goes so well with Cinnamon, yes? And Walnuts. Even though they aren’t the most appealing nuts in the taste department (unlike roasted almonds or cashews!) they are PACKED with goodness. So if you’re not a fan, maybe these morsels will help you to ingest them. You really should try to use organic apples as well, since they absorb more chemical residue (from pesticides, fertilisers etc) than many other fresh foods. Every year the Environmental Working Group (US) releases a list of the top 12 (“The Dirty Dozen”) foods to avoid if grown conventionally and apples seem to always appear near the top of the list. Here’s a link to the current list and the EWG site if you want to take a look: http://www.ewg.org/foodnews/list.php

It’s been a long time since I have made ‘balls’. I went through my obsession with them about 6 or 7 years ago when I first delved into the Raw Food arena, but found them a little time consuming and messy to make, all up. Yes, not a great advertisement I realise, but I “gots ta be” honest! Even with the Thermomix, it’s the rolling out and coating of the little suckers that chews up your time…and dirties your hands.Food Fervour

Nonetheless, I had an idea (and some time) yesterday, so I was going to test it out. Lucky for me, it worked. Well, the boss-man hasn’t had his share yet, but my physio and some of my private training clients have given them the thumbs up! (See, training with me doesn’t involve suggestive purchase of protein/nutrtional supplements or products…. my clients get to be guinea pigs for my whole, clean food experiments!) Warning: they won’t be really sweet, but if you use a sweeter variety of apple it could suffice. As a LAST RESORT, if you HAVE to add sugar (wusses!) I think coconut sugar would be your best option.

Basically you will need:

1 cup (130gm) dates, 1 cup (250gm) water, 1 apple, 1½ cups (150gm) walnuts, 2-3 heaped tspns ground cinnamon, 1 cup (60gms) desiccated coconut (extra for rolling), 3-4 teaspoons chia seeds.

Soak the dates in the water for at least an hour, then drain as well as possible, pressing out excess fluid out (I told you your hands would get dirty!) Place roughly chopped apple (skin ON, for nutrient density & fibre – unless it’s not organic & you are justifiably concerned) in a high-powered blender (Thermomixers, you know it!) until finely chopped. This will invariably involve a few stop-starts as you’ll need to scrape down the sides of the blender. Set the apple aside, rinsing & drying the blender as well as possible so that you can ‘pulverise’ (or not: sometimes chunks are good!) the walnuts. (Thermies: 5-10 secs, speed 7ish) Add the cinnamon, dates, apple, coconut and chia seeds, then blend and scrape until you feel the mixture is well enough combined.

Now, the messy part: pop some extra desiccated coconut on a large (dinner) plate and …..go wash your hands again! To make sure the balls are really ‘compact’ I palm roll them first, then roll in the coconut, and palm roll them again. Store in an airtight container in the fridge.