Raw Passionfruit Avocado Cheesecake

I’ve been admiring (& occasionally enjoying) the variety of raw cheesecakes that are slowly becoming more readily available at cafes and eateries, but had not bothered trying to make one even though I’ve been told many times that it’s ‘piece of cake’ (excuse the pun).

food fervourMy love of avocado has extended beyond its nutritional value because I’m now aware of its other ‘superpowers’! My first experience came with a green smoothie recipe. My how stuff ‘thickens up’ when you add this little dude to the mix! I noticed raw mousse recipes relied heavily upon avocado as well. That got me thinking about the texture and consistency of cheesecake.

Now I’m certainly by no means a pioneer in the avocado cheesecake world, but I can say it’s hard to find many raw cheesecake recipes on the net that employ ‘avos’ as the primary ingredient, which would indicate there’s heaps of room for experimentation. The vast majority use blended cashews as the ‘cream cheese’ base. I thought avocado would work because it’s naturally bland on the palate, but the PERFECT creamy texture.

Passionfruit isn’t necessarily a real favourite of mine, but they have been in season and moreover, they have a strong flavour …and a ‘tanginess’… which is what you find in an ordinary cheesecake. So I grabbed me some of ’em and got crackin’.

All 3 attempts were well received by a variety of tasters, but the last version was the best and it’s simply because I upped the amount of passionfruit. The stronger the fruit flavour, the better. But if you are going to play around here, I’ll just remind you that the more fruit, the more ‘wet’ the mixture = the less well the final product will set or hold together. (Think of fruit with maximum flavour, minimal moisture…)

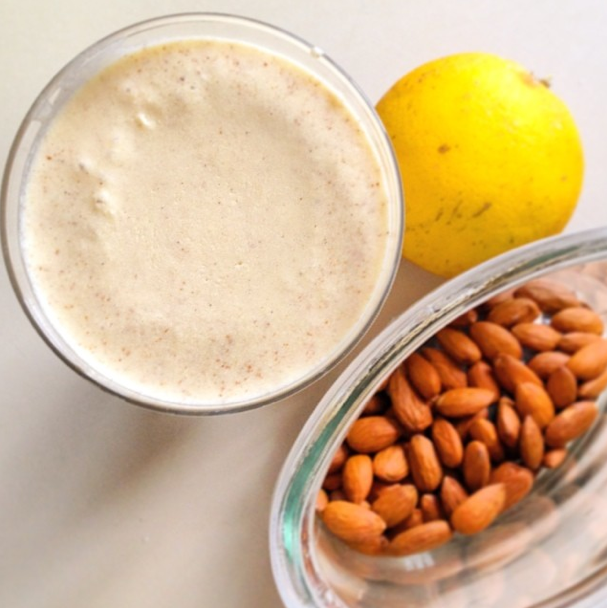
I used macadamia nuts for the base (borrowing from a recipe from Jo Whitton’s Quirky Cooking blog) because I always associate them with the tropics (and passionfruit’s definitely tropical) but almonds worked fine in my initial experiment so be creative if you like!food fervour

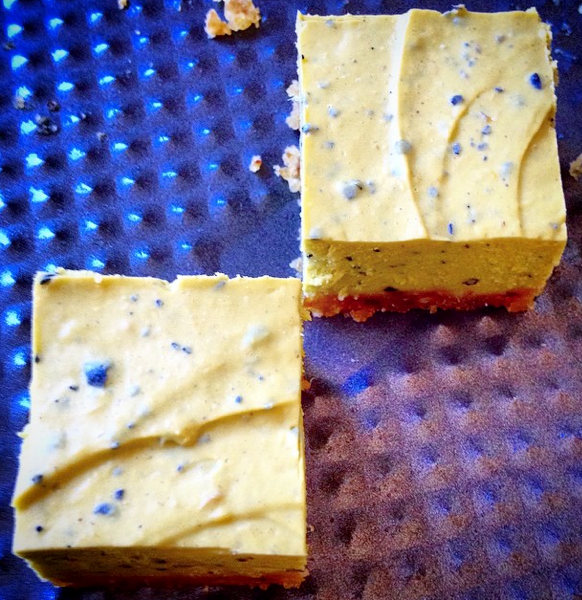
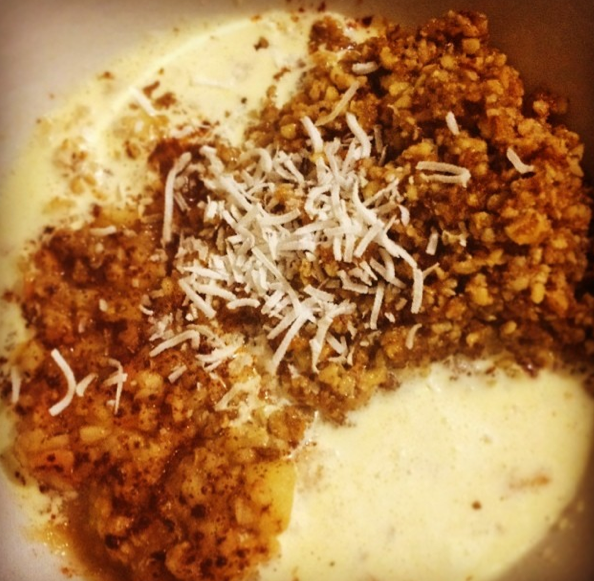
For the Base you will need: 130gm macadamias, 70gm desiccated/shredded coconut, 8 dates & a pinch of Himalayan salt

Simply blend everything thoroughly in a high powered blender (Thermomixers 20 seconds @ Speed 9) then press the mix over the base of a well-oiled (coconut oil is best) springform cake tin. Note: this will make a thin base – if you like thick cheesecake bases I recommend you double the ingredients. Set aside (or refrigerate in warmer climates).

For the Filling, you will need: 2 large (or 3 small) avocados, 4-5 passionfruit (depending upon how strong you’d like the flavour) 4 tablespoons maple syrup or coconut sugar, 4 tablespoons (approx 60 gm) coconut oil (melted), 2-3 teaspoons vanilla paste, optional 1 banana &/or ½-1 teaspoon grated ginger

Again, this is simply a blending exercise. (Even with a Thermomix I found myself stopping and starting, to check consistency & taste and scrape down the mixture) Start with the avocados, sugar/syrup, vanilla & if using, the banana/ginger. Blend well (Thermies approximately 20 seconds, Speed 5) Add the passionfruit pulp, blending until smooth (Thermies 20 seconds, Speed 5 & you may use Reverse speed so the passionfruit seeds aren’t pulverised initially). Finally add the coconut oil blending well again (Thermies 20 seconds, Speed 9 gradually)

Empty the filling over the base, smoothing off as evenly as possible, then allow to set in the refrigerator for at least 20 minutes (or the freezer if you can’t wait that long!) Then serve and enjoy 🙂


Vegan Hot Chocolate

I’ve been struggling finding hot winter drinks that aren’t full of caffeine, sugar or cow’s milk. Let me tell you, it ain’t easy. I’ve been playing around, mulling over what goes with what, and I reckon I’ve hit upon some pretty cool ideas. The current ‘Bulletproof’ (butter) coffee fad has even come into play…

This particular version of my experimental ‘healthy’ hot chocolate drinks was inspired by Nutella. Most people know that Nutella is a hazelnut based chocolate spread. So I used hazelnut milk (made freshly in my Thermomix first, via recipe in the new Quirky Cooking cookbook) and tied the ‘Bulletproof’ idea in via the inclusion of coconut oil and my choice of sweetener, coconut sugar. NB: I’m actually sensitising my taste buds by eating so ‘cleanly’ so the flavours here will be subtle, which means you may want to alter the amounts of cacao and sweetener to your liking.

food fervour

Unfortunately, I have to admit that if you don’t own a Thermomix I can’t offer you an alternative, because this recipe involves a short burst of high speed blending of hot liquid – which is definitely not to be attempted in a normal blender. (If however, you’re adept in the kitchen, I’m confident you’ll discover alternative means to create something similar!)

For a single serve you will need: 250gm hazelnut milk, 3 tspns cacao powder, 3 tspns coconut sugar, 1 tspn coconut oil (optional).

Place all ingredients in the Thermomix, cooking for 8 minutes, at 70ºC on Speed 4. At the end of the cooking period, programme 30 seconds at Speed 8 to ‘froth’ the mixture. Serve immediately.

Let your imagination run wild. This recipe is really a basic formula for any number of creations. I have used a variety of milks and come up with some amazing flavours, for example, a Spicy version to which I added heaps of cinnamon, some nutmeg, vanilla, garam masala & chilli powder! 😀


Nutrient Dense Porridge

Let me start out by saying my motivation for this post was not the great breakfast I just had. It was the thought behind it; my general philosophy about food. If we are meant to be eating less (portion control) how are we meant to get all the nutrients in? By thinking. And being creative. Yes, you need a little education, but it’s really NOT hard. Here’s my example…

I’m not necessarily a porridge fan. I have found I usually digest it too quickly and can feel hungry again within 3 hours. This I put down to the fact that in cooking the oats, I’m removing some of the workload that my digestive system would otherwise be lumbered with, in breaking down the food. Now, in Winter it gets pretty hard chowing down on my usual bircher brekky: eating or drinking cold makes me cold from the inside, so I turn back to porridge (it’s the quickest thing to make before I start work, especially in the Thermomix). The question is, how to make it last longer?

Simple: add protein and/or healthy fats and/or fibre. Most of us know – or have surely heard by now – that fibre, protein & fats are satiating. Fibre & protein usually because of their ‘complexity’, fats because of their density. So my go-to porridge recipe is now a mix of oats and protein rich quinoa flakes & chia seeds, with whatever milk I’m feeling on the day. It has made a huge difference.

So my point is: get a little educated & be creative. Learn something about REAL foods and the nutrients they contain, especially those with the highest quantities (this is why I believe vegetables should be the base of the Food Pyramid: no other food group contains same the array & density as this plant matter) and it will be easy to find ways to slot them into your meals without having to eat them in ‘excess’. (And for the record, even though I don’t throw the word into my recipes, ‘organic’ choices are definitely first option.)food fervour

So with that, here’s the recipe for a (sizeable) single serve of this morning’s apple cinnamon & chia porridge:

½ grated apple, 35gm oats, 5-10gms quinoa flakes, 5gms (1 head teaspoon chia) seeds, 90gm water, 150gm milk of choice (today I used almond) 1 teaspoon cinnamon, coconut sugar to taste.

Stovetop cooks place apple, oats, quinoa & chia, water & milk into saucepan over a medium-low heat, reducing to simmer as the mixture begins to bubble. you’ll need to stir continuously. I honestly have forgotten how long it takes to make porridge on the stove top, but I would think it would be about 8-10 minutes, similar to the Thermomix cooking time.

Thermomixers you can ‘grate’ your apple in the bowl for 5 secs speed 5, or Turbo a couple of times. Then add the oats, quinoa, chia, water & milk, cooking for 8 mins, 90ºC reverse speed 2.

Serve immediately, stirring through the cinnamon with any extra milk you may or may not like to add and top with coconut sugar to taste *not TOO much*!

Coeliacs would evidently replace oats altogether, using 40-45gm quinoa flakes however since quinoa (& especially chia) will require more fluid you may need to almost double the fluid quantities. Stove-top cooks will be able to gauge the mixture thickening, Thermomix users won’t. Trial & error. That’s what it’s all about!

Orange Almond Smoothie

Eden Health Retreat has a number of citrus trees scattered around the grounds so in winter there is quite a bountiful supply of oranges, grapefruit & lemons at our disposal.

With a couple of these oranges hanging around in my fridge, I decided to make a liquid version of a gluten free favourite: the orange almond cake. I had had lunch, and was hankering for a little dessert.

Thinking about an amazing green chai coconut smoothie recipe created by Jo Whitton (Quirky Cooking), I pulled together an idea for a rich drink that didn’t require ANY added sugars. And it worked. Warning: it’s very rich so you won’t need much. The following makes approximately 500mls; enough for two people. (Unlike this one, who guzzled it all down herself…and is paying the price!)food fervour

You’ll need: 50gm almonds, 1 orange (navel oranges are naturally sweeter) with all skin and pith removed, 60-80gm coconut cream, a pinch each of nutmeg & cinnamon, 1-2 teaspoons vanilla essence/paste, 200gm coconut water.

In a blender or Thermomix, mill the almonds into meal (Thermies 10 seconds, speed 9) then add all the remaining ingredients blending thoroughly (Thermies 1½ minutes, speed 9). Serve & consume immediately!

Since it’s winter here on the Gold Coast, I didn’t want to add ice, but in summer it would be an ideal addition. If need be, you could substitute the coconut cream & water with just coconut milk, but you’ll lose all the added goodness in the coconut water (higher concentration of minerals in that, than in the flesh, which is what the milks and creams are made from). You could also throw in a little fresh ginger for added nutrient value!

Mum’s Kifflitzers Re-Invented

I have an admission to make: until I got my Thermomix, I’d never made real custard. I’d either bought it ready-made or, worse, cooked up the powdered stuff. Yes, shocking I know. But, I learnt from my mum….monkey see, monkey do…

So when cleaning out my pantry one Sunday recently, I found a container of custard powder hiding at the back, and pulled it out to throw away. But then I had a ‘Moment’.

food fervour

I love my Mum’s handwriting…

I recalled some biscuits mum used to make that I loved: “Kifflitzers”. Custard powder was a ‘key’ ingredient. She’d given me the recipe (hand written of course) so as a tribute to her, I decided to make some before I ditched the processed rubbish for good. It’s kind of poetic and yet ironic: I’ll never see my mum again, and I’ll never buy custard powder again, so I’ll actually never make these biscuits according to this recipe again either. Even though they tasted SO GOOD…

My ‘obligatory’ changes to her original recipe, included opting for gluten free flour and vegan-friendly coconut oil instead of butter, and they turned out entirely different to Mum’s biccies, but still ridiculously more-ish. I have to add however, that some custard powders are NOT gluten free so check the ingredient list on the product packaging carefully.

My ingredient list included ⅔ cup Buckwheat flour, 125gm almond meal, ½ cup coconut sugar, 2 tablespoons custard powder, 90gms coconut oil (liquefied), 1 teaspoon vanilla (I used my homemade essence), approx 45gm almond milk.

The method is VERY simple. It takes less time than the oven takes to pre-heat (to 180ºC, by the way)! Because I’m a (proud) Thermomix owner, I freshly milled most of the dry ingredients first: placing the (⅔ cup) Buckwheat seeds and coconut sugar in together (approximately 10 seconds, Speed 9) then setting aside, so I could mill the (125gm) almonds into meal. I added the buckwheat & sugar mix back in to the Thermomix bowl, with the custard powder and mixed on speed 4 for a few seconds. For Non-Thermies, basically all you have to do is (sift &) mix all your dry ingredients together.food fervour

Add the vanilla, coconut oil & milk and mix well (Thermies 30 seconds, Speed 4-5) then mould spoonfuls onto oven trays lined with baking paper, with a little space between as they will flatten & spread during the cooking process. Bake for 10-20 minutes, depending upon your oven. Because of the high oil content, they will remain soft & ‘chewy’ even after cooling. Deeelish!


Deconstructed Apple Crumble

I have to admit I became a little distracted in my yoga class this afternoon. Somehow apples popped into my head (go figure?!) and my Samadhi was lost; the ‘Train of Thought’ left the station and a Craving was born. I was mulling over ideas for a warm apple dessert, but I knew an apple pie was out of the question. Waaaay too much time and effort.

So when I got home I looked up apple recipes in the Thermomix Recipe search engine, knowing that I was really looking for something ‘apple-crumble-ish’, to make it quick (minimal time between making and eating) but I realised they all still required oven baking. Pshhh!

So I decided to go with a ‘deconstruction’. As long as it was warm, I didn’t care.food fervour

For a single serve, one apple is plenty. I chopped it up roughly and threw it in the Thermie for a quick ‘Turbo’ smash-up (keeping the skin on – the more fibre the better!) then added about 10gms of water and set it to ‘stew’ for 3 minutes, 70ºC, Reverse Speed 2.

I popped the stewed apple straight into my serving dish (Thermie owners could put it in their Thermoservers to keep VERY warm, if you could be bothered to wash another item) showering it with ground cinnamon, then put 50gms walnuts in the bowl and chopped for about 6 seconds on speed 5-6. Adding 30gms coconut oil, 5-10gms coconut sugar and roughly a tablespoon (5gms) of psyllium husk I set it to cook for 2 minutes at 100ºC, Reverse Speed 2.

Scooping it straight into the dish with the apple, I poured in some fresh cream, garnishing with shredded coconut, then mixed it all up before taking the first spoonful. SO yummy. SO quick. SO satisfying. Instant gratification!

Kangaroo Bolognese

Some people can’t understand how I (or anyone) can eat our ‘national emblem’. The vegetarians’ and vegans’ opinions are justified but any other carnivore (or omnivore, for that matter) cannot complain about me eating ‘Skippy’ if they don’t think twice about eating ‘Daisy’, ‘Babe’ or Nemo!

Kangaroo meat is higher in protein than beef, naturally lower in fat as well, and provides the haem iron I choose to include in my diet. Added to the fact that it is considered ‘Game’ (wild caught) and therefore likely to be a much ‘cleaner’ source of animal protein to consume than the chemical-laden animals being farmed for bulk consumption.

From an anthropological perspective, humans evolved thanks to these kinds of meats: hunters (physically active people) originally had to chase down highly active creatures in order to eat. Daisy wasn’t docilely ‘grazing in the fields’ back then. It was suggested by one of my favourite fitness/nutrition/neuroscience gurus Paul Taylor that “you are the animal you eat”…

On with the story…

I picked up a kilo of kangaroo mince on sale and since I find the ‘mini-chore’ of divvying up individual portions kind of onerous, I decided to create something immediately to lighten my workload. I’m not usually a pasta fan, but somewhere along the line I’d bought some gluten free macaroni and since I’ve been trying to get rid of it (and cannot simply throw it out – wastage is a Sin!) for a while, “spag bol” came to mind.

Straight to the Thermie. Too. Easy. I literally walked in the door at 1:15pm and was eating by 2pm.food fervour

I threw 1 garlic clove, a roughly chopped brown onion, carrot & celery stem in the bowl and almost pulverised them (which ultimately resulted in a very smooth bolognese consistency) for 8 seconds on Speed 7. Then I threw in 20gm of olive oil, the 400gms of Skippy mince (instead of ‘Daisy’ & ‘Babe’) and various herbs (basil, nutmeg, parsley & a bay leaf) and set it on to cook for 10 minutes @ 100ºC, Reverse Speed 1.

In this time I apportioned the remaining kangaroo mince, put away the rest of the groceries and the already-used-ingredients, and pulled out the ones I had yet to use: red wine, tomato paste, tamari, the gluten free macaroni and parmesan cheese. And a zucchini, which I chopped up finely. (My usual bolognese recipe includes more vege – like capsicum & mushrooms – but I didn’t have my Thinking Cap on today. I was more interested in Time-Saving.)

food fervour

While the bolognese simmers away in the Thermomix, the Magic Bullet pulverises the parmesan…

Finally, I added the zucchini, 80gm red wine, 60gms water, 2 tspns tamari & about 300gm tomato paste, set the time to 16 minutes, again @ 100ºC, Reverse Speed 1 then set to work on the other elements:

Since I’m not yet an expert at multi-skilling with my Thermomix alone, I prepared the pasta to cook on the stovetop, boiling the electric jug first (ala Jamie Oliver-style) not just to speed up the process but also to minimise electricity usage a tad. Once the GF macaroni was bubbling away, I pulled out my handy little Magic Bullet, threw a chunk of parmesan in and grated that up in seconds. Everything was ready. I had time to begin the clean-up!

The alarm for my pasta went off literally seconds after the Thermie signalled she was done. Perfect timing. A heavy-duty meal – enough to feed four – complete within 45 minutes… Brilliant!


Gluten Free Fruit & Seed Loaf

food fervour

Raisin toast is loaded with sugar so I need to create a GF version minus excessive added sugar…

I used to have a real weakness for fruit toast. But I knew before I went off gluten that fruit loaves are full of sugar so I began limiting my ‘splurges’ anyway.

But I do miss ‘raisin toast’ from time to time, so my quest is to try to create a gluten free version that’s as similar to the ‘real thing’ as possible, minus the excess sugar of course. Trial and error is the only way, with the aid of heaps of research – Googling & others’ blogs! – and the courage to ‘alter’ (or ‘bastardise’ as I like to say) recipes. That kind of courage I definitely do not lack.

The loaf I just made was the result of an adaptation of Cyndi O’Meara’s gluten free bread recipe included a couple of Thermomix recipe books. I altered the dry ingredients a fair bit (due to both lack of some & preference for others), added a selection of spices, seeds, preservative-free dried fruits (these worked to sweeten the loaf more than the meagre amount of coconut sugar I opted for) and the kicker: I replaced xanthan gum & egg with soaked chia. I’d discovered this idea on a blog somewhere recently and then saw it used in a complimentary recipe on the Thermomix website.

food fervour

served up warm with my homemade butter

So… it turned out heavier than your typical commercial wheaten fruit loaf, but toasted up, I think it made the grade: particularly considering the vast majority of ingredients I used were unprocessed, which as far as I’m concerned is the most important thing.

If you don’t have a Thermomix the recipe should still work (you’ll have to buy your flours pre-milled) but will involve a lot more elbow grease in the mixing stages! Here’s what I used this time around:

2 tbspn chia seeds, 8 tbspn water, 280gm whole buckwheat, 100gm brown rice, 40gm dried chickpeas, 1 heaped tspn whole cloves, 35gm cornflour, 1 tspn cinnamon, 1 tspn nutmeg, 1 tspn garam masala, 10gm instant yeast, pinch (Himalayan) salt, 20gm coconut sugar, 400gm lukewarm water, 30 gm macadamia oil, 1 tspn vanilla essence, 1 tbspn apple cider vinegar, 80gm chopped dates, 80gm sun raisins, 45gm pumpkin seeds (pepitas), 40gm sunflower seeds.

Firstly I put the chia seeds and 8 tbspn water in a jar, shook it up and left it to ‘absorb’ while milling the buckwheat, brown rice, chickpeas & cloves in the Thermomix (1 minute, Speed 9). I added the remaining dry ingredients (cornflour, the powdered spices, yeast, salt & coconut sugar) and mixed lightly (15-20 seconds, Speed 4-5) before adding the water, oil, vanilla, vinegar and chia seed gel for another 15-20 seconds on Speed 5-6. I finally added the dried fruit & seeds, mixing gently on Reverse, Speed 1-2 for 20-30 seconds (to be honest, I can’t recall how long). Ready to empty the ‘batter’ into my greased & lined loaf tin, I placed it directly into the cold oven so it could ‘prove’ for the 15-20 minutes it takes to heat up to 180º. (The appliance in my rental home is ‘ancient’ & even though it is fan-forced, it’s pretty ‘slow’.) So from go to whoa, it should take about an hour: 20 minutes proving + 40 minutes cooking @ 180ºC.

Don’t expect a sweet cake-loaf: as I said earlier the meagre amount of coconut sugar is literally swamped by the other ingredients. So much so that the next time I cook this (or something similar) I’ll leave it out altogether and simply up the dried fruit content. Oh and nuts, I’ll definitely add chopped nuts. I’ve also read that the longer the dough (in this case ‘batter’) proves the better, so next time I might let it sit for longer before turning the oven on… I’m not sure if this applies to heavy gluten-free-grain-and-seed-floured doughs but if someone out there knows, please speak up!


Dessert for Breakfast

So there’s this Thermomix recipe that I’m in love with. It’s classed as a ‘breakfast’ dish, but to my mind, it’s TOO luscious and (here comes the Health Nazi) not really packed full enough of nutrients to constitute an everyday healthy meal. (I’ll talk about my typical breakfast choice another time.)

But it’s Sunday. And while I am waiting for my first attempt a gluten free fruit loaf to cook, I have to put something in the belly.

food fervour

The first time I made CADA I fell in love with it

CADA stands for Coconut, Apple, Date & Almond. It’s incredibly simple. You throw all of these ingredients in and Turbo a few times. Voila! The recipe asks for coconut flesh which personally I never have on hand, so my version replaces it with shredded coconut after the mix hits the serving dish. Then I add cinnamon and thick greek yoghurt and I swear it’straws just like eating apple pie with cream. Or apple crumble. Kind of.

food fervourToday I dropped the coconut in favour of some strawberries. For this single serve, I used ½ a green apple, approx 30gms (6-8) dates, 35gm roasted almonds and a handful of fresh strawberries. I’d recommend (Thermie user or not) you blast the almonds, dates and apple first then add the strawberries for the final ‘wazz’ since they’re too soft to withstand a heavy beating. Topped with 2 substantial dessertspoons of Greek yoghurt and about a teaspoon of coconut sugar, it was to die for! Next stop will be the blueberry version….

Green Smoothies Don’t Have to be Green…

Take this for example:food fervour

In fact, I’d say most of the green smoothies I make are brown. Because I LOVE cacao. Why not have a chocolate flavoured smoothie if you have the choice?

Cacao is the raw form of cocoa and therefore even more nutrient dense. And its (delicious) strong flavour helps disguise the bitterness that many kale varieties posses. The smoothie I just made (pictured) had 4-5 kale leaves in it and it only took 2 heaped tablespoons of cacao powder (oh ok, and the dates) to camouflage the acrid (but oh-so-healthy) green.

You really can have a lot of fun experimenting with green smoothies. If you are new to them, work off the ratio of 60% fruit to 40% greens until you acquire a taste.

For this particular smoothie (it made enough for two, by the way) I threw 2 bananas in the Thermomix, with 4-5 de-stemmed kale leaves, about 2 heaped tablespoons of cacao powder, 4-5 dates, a handful of (frozen) blueberries and approximately 300mls coconut water and blended it all on for about 40 seconds on Speed 9. For non-Thermies, blend for as long as you need to on the highest speed (to really break down the dates and kale).

I shouldn’t have any muscle cramps for the rest of the day, with the amount of magnesium (thanks to the Cacao & coconut water) in this drink. 😉