Orange Almond Smoothie

Eden Health Retreat has a number of citrus trees scattered around the grounds so in winter there is quite a bountiful supply of oranges, grapefruit & lemons at our disposal.

With a couple of these oranges hanging around in my fridge, I decided to make a liquid version of a gluten free favourite: the orange almond cake. I had had lunch, and was hankering for a little dessert.

Thinking about an amazing green chai coconut smoothie recipe created by Jo Whitton (Quirky Cooking), I pulled together an idea for a rich drink that didn’t require ANY added sugars. And it worked. Warning: it’s very rich so you won’t need much. The following makes approximately 500mls; enough for two people. (Unlike this one, who guzzled it all down herself…and is paying the price!)food fervour

You’ll need: 50gm almonds, 1 orange (navel oranges are naturally sweeter) with all skin and pith removed, 60-80gm coconut cream, a pinch each of nutmeg & cinnamon, 1-2 teaspoons vanilla essence/paste, 200gm coconut water.

In a blender or Thermomix, mill the almonds into meal (Thermies 10 seconds, speed 9) then add all the remaining ingredients blending thoroughly (Thermies 1½ minutes, speed 9). Serve & consume immediately!

Since it’s winter here on the Gold Coast, I didn’t want to add ice, but in summer it would be an ideal addition. If need be, you could substitute the coconut cream & water with just coconut milk, but you’ll lose all the added goodness in the coconut water (higher concentration of minerals in that, than in the flesh, which is what the milks and creams are made from). You could also throw in a little fresh ginger for added nutrient value!

Turmeric Egg on Toast

I just rushed in from a resistance training session, and had to rush out again in minutes, so how was I going to re-fuel? Since it’s winter here, I’m loathe to make a protein smoothie in my Thermomix because it’ll chill me from within.

The quickest, warmest, high protein, healthy fats replacement is a boiled egg on toast. I boiled the jug ala Jamie Oliver style, popped the egg and water in a small saucepan and let the stovetop catch up while I pulled out an avocado and the frozen (gluten free) bread slice ….when I saw it. The frozen Turmeric bulb. How would that go with egg? Turns out: ….brilliantly.food fervour

I smashed half an avocado on the toast, spread the egg over the top, then finely grated turmeric over all of that. With some Himalayan salt (I love salty eggs) & the slimmest drizzle of olive oil, it tasted DIVINE. And I just upped the nutrient density and anti-inflammatory properties of my post-training fuel, with minimal effort.

Up there for thinkin’, down there for dancin’!


Hot Brekky in a Hurry

Working on a Sunday is never really fun, I mean, who wants to rush around on Sunday? I wasn’t starting work until 9:30am but I usually like to leave myself about an hour to get there. I’d been up for awhile drinking tea, messing around, when I realised it was close to 8am and I had to start getting my lunch ready. With about half an hour up my sleeve, I knew I’d easily have time to make a black quinoa salad, thanks to my beloved Thermomix.

It only takes 18 minutes…plenty of time! While I was chopping up the veggies I wanted to add to the salad, I was inspired to make myself a hot breakfast – after all, I had heaps of time, right? I mean, with Thermie taking care of lunch I had all this time to fry up some stuff….right?

Oh dear. Talk about multi-tasking! Even with my lunch veggies ready to add to the quinoa in the last 4-6 minutes, I was really pushing it. But I did it, and it was super wholesome and very tasty even though I inhaled it!

Somehow I managed – within 45 minutes – to prepare a quinoa salad, an apple & coconut chia dessert cup, do ¾ of the washing up, cook and eat the following super nutritious (and filling) hot brekky before leaving for work:

food fervour

Smashed fried eggs atop mushroom & capsicum Hash with (gluten free) avocado toast

Pop about 1 tablespoon of coconut oil in a frying pan over a medium heat, then chop up 8-10 mushrooms and ¼ capsicum. Throw them straight in the pan then de-stem and roughly chop up 3 kale leaves. Stir the mushroom & capsicum Hash then grab 2 eggs, ½ avocado and prep your toast by sitting it in the toaster so it’s read to go (I use gluten free bread).

Add the kale to the Hash and stir until it has wilted (a couple of minutes, tops). Start the toaster then serve up the Hash, returning the pan to the stovetop, adding a little more coconut oil and breaking the eggs into the pan. Spread the avocado over your toast (on the plate with the Hash) then with the spatula, roughly scrape the frying eggs from the pan base, tearing and smashing them up as you tip them on top of the Hash. Season and get stuck into this messy but highly nutritious and satisfying breakfast.

Kangaroo Bolognese

Some people can’t understand how I (or anyone) can eat our ‘national emblem’. The vegetarians’ and vegans’ opinions are justified but any other carnivore (or omnivore, for that matter) cannot complain about me eating ‘Skippy’ if they don’t think twice about eating ‘Daisy’, ‘Babe’ or Nemo!

Kangaroo meat is higher in protein than beef, naturally lower in fat as well, and provides the haem iron I choose to include in my diet. Added to the fact that it is considered ‘Game’ (wild caught) and therefore likely to be a much ‘cleaner’ source of animal protein to consume than the chemical-laden animals being farmed for bulk consumption.

From an anthropological perspective, humans evolved thanks to these kinds of meats: hunters (physically active people) originally had to chase down highly active creatures in order to eat. Daisy wasn’t docilely ‘grazing in the fields’ back then. It was suggested by one of my favourite fitness/nutrition/neuroscience gurus Paul Taylor that “you are the animal you eat”…

On with the story…

I picked up a kilo of kangaroo mince on sale and since I find the ‘mini-chore’ of divvying up individual portions kind of onerous, I decided to create something immediately to lighten my workload. I’m not usually a pasta fan, but somewhere along the line I’d bought some gluten free macaroni and since I’ve been trying to get rid of it (and cannot simply throw it out – wastage is a Sin!) for a while, “spag bol” came to mind.

Straight to the Thermie. Too. Easy. I literally walked in the door at 1:15pm and was eating by 2pm.food fervour

I threw 1 garlic clove, a roughly chopped brown onion, carrot & celery stem in the bowl and almost pulverised them (which ultimately resulted in a very smooth bolognese consistency) for 8 seconds on Speed 7. Then I threw in 20gm of olive oil, the 400gms of Skippy mince (instead of ‘Daisy’ & ‘Babe’) and various herbs (basil, nutmeg, parsley & a bay leaf) and set it on to cook for 10 minutes @ 100ºC, Reverse Speed 1.

In this time I apportioned the remaining kangaroo mince, put away the rest of the groceries and the already-used-ingredients, and pulled out the ones I had yet to use: red wine, tomato paste, tamari, the gluten free macaroni and parmesan cheese. And a zucchini, which I chopped up finely. (My usual bolognese recipe includes more vege – like capsicum & mushrooms – but I didn’t have my Thinking Cap on today. I was more interested in Time-Saving.)

food fervour

While the bolognese simmers away in the Thermomix, the Magic Bullet pulverises the parmesan…

Finally, I added the zucchini, 80gm red wine, 60gms water, 2 tspns tamari & about 300gm tomato paste, set the time to 16 minutes, again @ 100ºC, Reverse Speed 1 then set to work on the other elements:

Since I’m not yet an expert at multi-skilling with my Thermomix alone, I prepared the pasta to cook on the stovetop, boiling the electric jug first (ala Jamie Oliver-style) not just to speed up the process but also to minimise electricity usage a tad. Once the GF macaroni was bubbling away, I pulled out my handy little Magic Bullet, threw a chunk of parmesan in and grated that up in seconds. Everything was ready. I had time to begin the clean-up!

The alarm for my pasta went off literally seconds after the Thermie signalled she was done. Perfect timing. A heavy-duty meal – enough to feed four – complete within 45 minutes… Brilliant!


Gluten Free Fruit & Seed Loaf

food fervour

Raisin toast is loaded with sugar so I need to create a GF version minus excessive added sugar…

I used to have a real weakness for fruit toast. But I knew before I went off gluten that fruit loaves are full of sugar so I began limiting my ‘splurges’ anyway.

But I do miss ‘raisin toast’ from time to time, so my quest is to try to create a gluten free version that’s as similar to the ‘real thing’ as possible, minus the excess sugar of course. Trial and error is the only way, with the aid of heaps of research – Googling & others’ blogs! – and the courage to ‘alter’ (or ‘bastardise’ as I like to say) recipes. That kind of courage I definitely do not lack.

The loaf I just made was the result of an adaptation of Cyndi O’Meara’s gluten free bread recipe included a couple of Thermomix recipe books. I altered the dry ingredients a fair bit (due to both lack of some & preference for others), added a selection of spices, seeds, preservative-free dried fruits (these worked to sweeten the loaf more than the meagre amount of coconut sugar I opted for) and the kicker: I replaced xanthan gum & egg with soaked chia. I’d discovered this idea on a blog somewhere recently and then saw it used in a complimentary recipe on the Thermomix website.

food fervour

served up warm with my homemade butter

So… it turned out heavier than your typical commercial wheaten fruit loaf, but toasted up, I think it made the grade: particularly considering the vast majority of ingredients I used were unprocessed, which as far as I’m concerned is the most important thing.

If you don’t have a Thermomix the recipe should still work (you’ll have to buy your flours pre-milled) but will involve a lot more elbow grease in the mixing stages! Here’s what I used this time around:

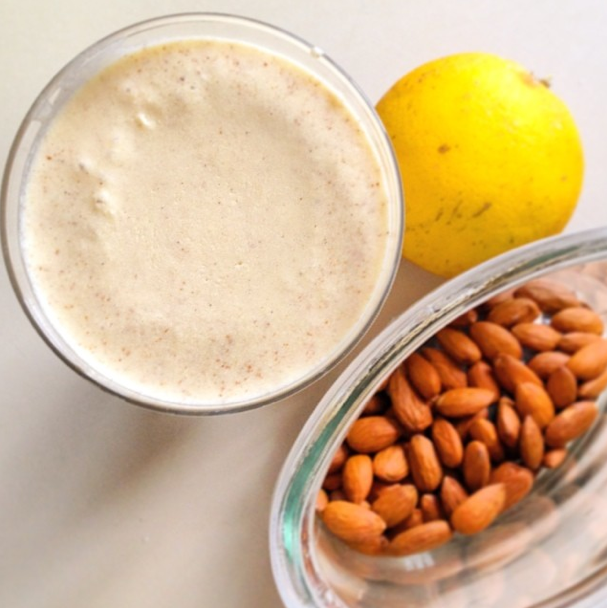
2 tbspn chia seeds, 8 tbspn water, 280gm whole buckwheat, 100gm brown rice, 40gm dried chickpeas, 1 heaped tspn whole cloves, 35gm cornflour, 1 tspn cinnamon, 1 tspn nutmeg, 1 tspn garam masala, 10gm instant yeast, pinch (Himalayan) salt, 20gm coconut sugar, 400gm lukewarm water, 30 gm macadamia oil, 1 tspn vanilla essence, 1 tbspn apple cider vinegar, 80gm chopped dates, 80gm sun raisins, 45gm pumpkin seeds (pepitas), 40gm sunflower seeds.

Firstly I put the chia seeds and 8 tbspn water in a jar, shook it up and left it to ‘absorb’ while milling the buckwheat, brown rice, chickpeas & cloves in the Thermomix (1 minute, Speed 9). I added the remaining dry ingredients (cornflour, the powdered spices, yeast, salt & coconut sugar) and mixed lightly (15-20 seconds, Speed 4-5) before adding the water, oil, vanilla, vinegar and chia seed gel for another 15-20 seconds on Speed 5-6. I finally added the dried fruit & seeds, mixing gently on Reverse, Speed 1-2 for 20-30 seconds (to be honest, I can’t recall how long). Ready to empty the ‘batter’ into my greased & lined loaf tin, I placed it directly into the cold oven so it could ‘prove’ for the 15-20 minutes it takes to heat up to 180º. (The appliance in my rental home is ‘ancient’ & even though it is fan-forced, it’s pretty ‘slow’.) So from go to whoa, it should take about an hour: 20 minutes proving + 40 minutes cooking @ 180ºC.

Don’t expect a sweet cake-loaf: as I said earlier the meagre amount of coconut sugar is literally swamped by the other ingredients. So much so that the next time I cook this (or something similar) I’ll leave it out altogether and simply up the dried fruit content. Oh and nuts, I’ll definitely add chopped nuts. I’ve also read that the longer the dough (in this case ‘batter’) proves the better, so next time I might let it sit for longer before turning the oven on… I’m not sure if this applies to heavy gluten-free-grain-and-seed-floured doughs but if someone out there knows, please speak up!


So, Pancakes…

food fervour

Cinnamon Buckwheat Pancakes with Vanilla Brazil Nut Cream, Cacao Avocado Mousse & Berries

They are the quintessential sweet tooth’s Sunday breakfast. I always thought they were too much work…until about a year ago. When I got my little ‘Magic Bullet’ blender, the elbow-grease factor became zilch. And really, in terms of ingredients, they have never been a difficult option.

I am not coeliac, nor am I even gluten intolerant, but I have discovered enough about the stuff to want to cut it from my diet. In the event that the information I have is incorrect, I choose to avoid it for no other reason than the amount it bloats me (and you really have to give the stuff up, then consume it again to notice the difference).

food fervour

Coconut pancake FAIL

So my pancakes of choice are made with buckwheat flour (now that I have my Thermomix, I’ll be milling my own, yippee!) but I have experimented with a few different kinds. Coconut doesn’t work so well for me (see pic) but quinoa is nice, if a little bitter. There is so much fun to be had, mucking around with a basic pancake recipe!

This Sunday just gone I created the gourmet feast you saw above, based on cinnamon buckwheat pancakes. If anyone wants to spoil their mother this Sunday (Mother’s Day) you may want to pay attention as I divulge recipes for three parts of the meal, over the next few days. Just to confuse, I’ll start here with the pancakes, even though they’re last likely to be the last thing you’ll create.

Pancakes really are too easy. The ratio is pretty much 1:1:1. One cup of SR flour, one egg & one cup of milk. And that will feed two people (since I’m only one I halve the amounts – which makes the pancakes a little more ‘eggy’ – but I don’t mind, more protein for me!) So my buckwheat pancakes demand thus:

1 cup buckwheat flour, 1 teaspoon bicarb soda, 1 egg, 1 cup milk (I used almond this time) Oh and one hefty teaspoon of cinnamon….since cinnamon pancakes

Pop your frypan on a medium-low heat, drop in some coconut oil and blend the pancake ingredients well. Drop a small amount of batter in first, to make your ‘tester’.  If that bubbles, turns easily and browns nicely, go for your life with the rest! Stack on one plate or if you’re ‘particular’ about them remaining really warm, you’ll have needed to preheat your oven on a low temp so you can shove them in there as you cook. (Thermie peeps can chuck them in a ThermoServer…ain’t nuthin’ goin’ cold in that thing!)

Quick Quinoa & Haloumi Salad

I’ve already told you I’m lazy, right? Well this dish (it changes every time) is one of the easiest I know to make when I want something substantial – and slightly warm. Lunch in a hurry today…

I’m loving quinoa (most of you know by now its pronounced ‘keen-wah’ not ‘kwin-o-ah’) as much as the next healthy foodie and I’ve worked out it’s because it kills two birds with one stone: it has ‘complex-carb-functionality’ but an incredibly higher protein content than your average rice or couscous serving. So it makes for a great base to what would normally be a primarily veggie-based meal (what salad isn’t? Oh yeah….pasta salad. Urgh.)Food Fervour

You can throw in whatever you like, considering there are a couple of processes involved (oooh, very technical and not-so-lazy of me!) but make sure you pack in the vege. I’m loving the stronger flavour of red quinoa at the moment but the usual kind will do.

For a single serve of this messy little concoction (pictured) you will need:

1/4 cup rinsed -or previously soaked- red quinoa, 1/2-3/4 cup water, coconut oil, 1-2 tbspn cornflour, approx 100gms haloumi cut into chunks, 1/2 small red capsicum roughly chopped, 2 kale leaves de-stemmed & finely chopped, a decent handful of rocket or spinach roughly chopped, 1-2 tbspn pine nuts (toasted if you can be bothered), 1/2 avocado sliced diagonally, juice of 1/2 lime, 2-3 tablespoons olive oil, Himalayan salt (if required)

Place the quinoa & water in a saucepan, bring to the boil then reduce to simmer partially covered for 12-15 minutes. (I actually use my Thermomix for this because it cooks quinoa than I ever have been able to). Meanwhile, pop the oil in frying pan over a medium heat and quickly roll your haloumi chunks in the cornflour. Add them to the pan along with the capsicum and cook for about 4-5 minutes, turning the browning cheese and stirring the capsicum. Add the kale, combining with the capsicum and cook for a further 2-3 minutes or until the kale has wilted.

Make a bed of the rocket/spinach in your serving dish, dump the quinoa on top, then the capsicum & kale over that (we’re not about ‘Looks’ here!). Arrange your avocado slices & haloumi chunks on top then sprinkle over the pine nuts. Add lime juice & olive oil separately by hand, or mix them if you want to add to the washing up.

Salt if you need it, and chow down.