Cauliflower Pizza Bases

Food FervourI was skeptical about this notion when I first heard of it. Could cauliflower really imitate a dough base and hold together under the weight of all those toppings? I had to try for myself. And I was completely surprised (and smitten) when I made my first one. Now I can’t look back. Whilst they’re neither a thin crunchy base, nor a thick chewy, doughy one, they do manage to hold together well enough to support all your toppings (and I usually pile on way more than you’d get in your typical takeaway pizza). They are…. amazeballs.

Why opt for cauliflower over grain-dough bases? My primary reason is because it’s a vegetable. Whilst I prefer not to demonise foods, I would choose a vegetable over a grain in this case purely for its nutritional content. In general veggies provide more nutrient density and variety. And then there’s the fact that cauliflower’s pretty much starch (complex carbohydrate) -free compared to dough, which matters if you are ‘watching your weight’. Finally, there’s the gluten issue: this is perfect for coeliacs or the gluten intolerant.

Food Fervour

Chopped fresh flat leaf parsley features in this cauliflower pizza base

And best of all, you only need – at the very least – TWO ingredients: cauliflower and eggs. Many cauliflower pizza base recipes will include more than two, but they really are optional: the vegetable and eggs on their own will work just fine …but it is fun to play around with add-ins. I’ve experimented with a few of the following: obviously salt & pepper, but also chopped/dried herbs, grated cheese, tomato paste and I just LOVE nutritional yeast flakes (idea borrowed from Lee Holmes’ Supercharged Food).

It’s such a simple procedure, however the success of your base will be largely determined during one specific step. Here’s the method, based on 500gm cauliflower and 2 eggs:

Pre-heat Oven to 200ºC and line a baking tray with baking paper. Set aside.

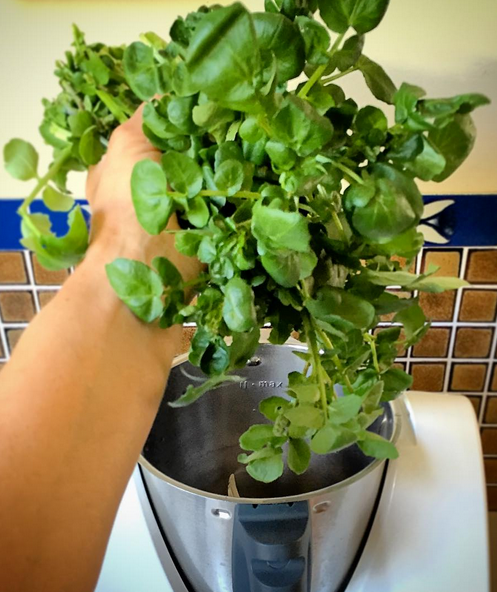
Steam Cauliflower florets:

Manually: In a medium/large saucepan, bring add approx 2-3cm of water to the boil over high heat (cover with the lid to expediate this or better still, add boiling water from a freshly boiled electric jug to a large saucepan on the stovetop, on high heat). Add the florets, drop the heat back to simmer and keep the lid on the saucepan. Your cauliflower should cook in 4-5 minutes (check softness with a utensil). Thermomixers: Add 500gm of water to bowl then place cauliflower florets in basket. Programme 14 minutes, Varoma, speed 1-1.5.

Remove Excess fluid from the Cauliflower (this is the crucial step):

Allow cauliflower to cool (you can rinse under cold water to expediate this). Drain all excess water from the florets then roughly chop or mash the cauliflower (in the same saucepan …to save on dish-washing). Thermomixers can simply chop at Speed 5 or Turbo for a few seconds). Empty it all into the centre of a clean cotton tea towel, then, pulling the sides up, begin to squeeze out as much excess water as possible …into the sink for drainage (or over a bowl if you like to conserve your veggie water). The volume of cauliflower will pretty much halve in size. The more fluid you extract, the firmer your pizza base will be.

The Ingredient Mix:

Food Fervour

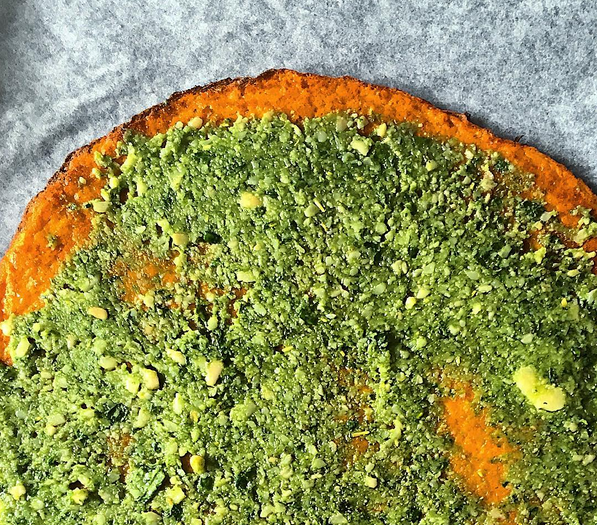
Tomato (paste) pizza base spread with fresh basil pesto, ready for toppings…

Manually: Return the mashed cauliflower to a bowl (scraping the veggie fibre from the tea towel – waste not, want not!) add the eggs and whatever else you’d like to add to the base, and mix thoroughly. Thermomixers: pop it all into the bowl and blend up to Speed 5 for about 10 seconds (you may want to scrape down the bowl down in between?)

Shape & Cook:

Tip the mixture into the centre of the paper-lined tray, and use a spatula to shape your pizza base. Aim for about ½-cm in thickness.

Pop into the oven and cook for 20 minutes, earmarking to turn the base over at about the halfway mark if possible.

Toppings:

Use the 20 minutes base cooking time to prepare your toppings. I’ll often fry up some mushrooms, preservative free bacon, capsicum and/or zucchini… I’ll boil the electric jug again and blanche some asparagus or broccoli… or make some basil pesto to use as the pizza base spread. You can grate your cheese now as well, so that you’re one hundred percent ready to dress the base.

Food Fervour

Leftover lunch slice of bacon & mushroom pizza

Once the base is done, and your toppings are spread, pop the pizza back in the oven for 7-10 minutes. It goes without saying, you need to serve immediately …but I have successfully refrigerated uneaten portions to enjoy for lunch the next day, just as you might do with a commercial pizza.

These really are the Bomb! If you are in the Gold Coast region, you can book a FoodPT with me to watch me demonstrate this procedure (it’s one of my most popular classes) and you get to eat the results. Find my contact details on the ‘Menu’ Page.


Blueberry Broccoli Leaf Smoothie

I have to admit that my broccoli plants here at home are a little bit of a disappointment. They haven’t really ‘performed’ yet – I’m still waiting for a ‘crop’. Sure, a few florets have popped up here and there, but they’re hardly enough for one meal.

So in the meantime, I’m culling the foliage (…um, also because I’m fighting a seemingly never-ending battle with aphids…) and rather than discard these nutrient dense leaves I try to find ways to get them into my body. Most people wouldn’t consider using broccoli leaves, but they are actually quite healthful: think kale. They’re very similar in texture (they actually belong to the same plant family – Brassica) …and like kale, one of the easiest ways to consume them quickly is to break ’em down in a blender.Food Fervour

Unable to find any exciting smoothie recipes that specifically included broccoli leaves, I ended up tweaking one I found on the site Pop Sugar, that asked for the vegetable itself. (Take a look here if you’re curious.) I substituted blueberries for the strawberries and completely forgot about adding yoghurt …but I think that was a blessing in disguise. The kicker was the peanut butter: I’ve never used it in a smoothie before, but …wow. I totally think it made this drink. One hundred percent.

Besides your trusty blender, you’ll need 1 frozen banana (chopped into chunks) 2 heaped teaspoons of peanut butter, ½ cup frozen blueberries and about 8 broccoli leaves (I used more because mine varied in size).

Throw it all in the blender with at least 1 cup of cold water (I added more after the first mix) then guzzle with glee.

It did occur to me that those with peanut/nut allergies could try substituting with tahini but having a much stronger flavour, I’m not sure if it would end up as tasty. If anyone decides to give it a go however, please let me know what happens!

Lychee, Lime & Mint Water

I’ve noticed that Fruit Water is starting to trend a little more now… and I mean fruit water beyond just lemon or lime or mint floating around in your glass: large jugs or urns with anything from cucumber to peach or mango flesh lolling around the bottom. This is meant to impart a tinge of flavour to make water consumption more tolerable to those who just don’t like drinking it.

I have no problem drinking water at all, but lately I’ve begun saving the water used when I’ve steamed veggies (knowing that some of the nutrients lost from the vegetables in the cooking process end up in the water) …and it’s not really enjoyable to drink straight. The I Quit Sugar gang suggest saving and using it in your smoothies. That’s a fantastic idea, but… I don’t consume smoothies often enough to use up all the water within a few days. So I needed to conceptualise some way to use larger quantities of the water in a single serve.

It wasn’t a complex idea, combining the ‘whole-fruit-in-water’ concept with the ‘nutrient-dense-steamed-water-for-smoothies’ notion, but I didn’t know if it would work. I mean, would it actually taste nice? There was obviously only one way to find out…

Food FervourMy first attempt involved fresh blueberries. And it shocked the pants off me. (Not literally.) It was delicious. Unfortunately I didn’t note the quantities, but I do recall using a decent handful of blueberries and perhaps 1-1½ cups of cold (veggie) water. And it really was this simple:

Water + whole fruit → blended = natural cordial.

Naturally this may only work with certain kinds of fruit …especially when you are already using steamed vegetable flavoured water… fruits that are naturally sweet and easily blended. For example, oranges may be too tart and fibrous – unless you can be bothered to remove the membrane and seeds from each segment…

Lychees are a naturally sweet and juicy fruit and I happened to have a bunch of them in the fridge. But because they’re also subtle in flavour, I thought I’d better add something else, to ensure I’d disguise the water’s taste. Since lime (like lemon) is well known to help intensify flavours (of other foods, besides themselves!) and I happened to have half a lime in the fridge, I opted for that and, in case that wasn’t enough, I added mint as well: another strong flavour and perfect compliment to both lychees and lime (…and very Asian…)Food Fervour

So for my single serve, this is what I used: 300mls water, the flesh of 6 lychees, a hand-squeeze of fresh lime, 10 or so mint leaves, 6-8 ice cubes.

Blend simply for as long as you wish, and serve immediately.

It’s a light, very refreshing bevvy, perfect for hot days like those we’ve been experiencing lately on the Gold Coast (…gotta love summer!) but just remember that unlike pure water, this beverage contains calories, so despite it being a far better option than juice, cordial or soft drink, it wouldn’t be such a great idea to chug down gallons of it on a daily basis either. Treat it as… a treat! Enjoy …and let me know what other fruit works if you feel adventurous!


Monkey Bread Breakfast

While Sunday seems like the right day for decadence, I’m really not sure my breakfast this morning fits the bill. It’s so ridiculously dessert-like that I’m… I’m almost feeling… guilty.Food Fervour

You see, yesterday I decided to try a recipe for something I’ve never (to my knowledge) eaten before: Monkey Bread. I’d been preparing my spelt sourdough from Jo Whitton’s Quirky Cooking, when on a whim, I decided to keep on cooking …I had the time and the ingredients (kind of)… and I chose her to try her monkey bread.

As with many of my yeast-based bread attempts, it didn’t seem to turn out the way it should have …according to photos of other Monkey Breads I’ve seen. But then, I did make a couple of small adaptations: I halved the quantities (that shouldn’t’ve mattered) added cinnamon to the dough (this neither) and finally used maple syrup in the ‘butter sauce’ instead of solid sugar granules (like rapadura or coconut sugars). That most certainly could have had some effect on the outcome. But I tell you what, I don’t regret it because I had a bit left over, and it was an integral element of my wicked breakfast today.

Suffice to say, it still tasted good (and I only ever throw out totally inedible foodstuffs) so after it had cooled right down, I cut it into slices and shoved it in the freezer for future consumption. No surprise that it ended up on my mind this morning. At first I envisaged trying to make French toast with it but laziness kicked in, and I opted for super simplicity: toasting (in the griller). No frypan to wash up, you see. 😉

It came together with just the following ingredients: two slices of monkey bread (you could use banana bread or slices of some other sweet loaf) one banana, a ‘scattering’ (small handful) of macadamia nuts, 2-3 heaped tablespoons of Greek yoghurt and about a tablespoon of the leftover vanilla-butter-maple syrup sauce (you could of course substitute with straight maple syrup, but you definitely will not need a whole tablespoon; try 2 teaspoons) (FYI, the ‘black bits’ in the sauce in the picture above are fragments of vanilla bean from my homemade vanilla paste.)

Toast the bread in the grill, whilst slicing up the banana. Break the toasted bread into chunks in your bowl, scatter over the banana slices and macadamias then top with the yoghurt. Finally drizzle over your sauce/syrup. You could scatter some berries on top as well for a burst of freshness (this came to me after I’d emptied the contents of the bowl into my body, dammit!)

If you give this a go, please let me know what you think: breakfast or dessert? 😉

Avocado, Tomato & Cheddar Salad

As I’ve said before, salads are the quickest, easiest way to pack a wide variety of nutrients into one meal (see my ‘How To’ post,

The Quickest, Easiest Nutrient-Dense Meal

) and since it’s so humid today, I’m feeling lazier than usual. So salad for lunch it is. Cutting board, check. Knife, check. Bowl, check.

Food FervourCraving some cheese, (I’ve started buying vintage cheddars because I love the sharp saltiness of aged ‘tasties’) I decided to run with a traditional popular combo, cheese ‘n’ tomato. And since avocado is so good for you, as well as complementing both of these foods, it had to feature prominently too.

So, starting with a handful of watercress (you could use any green leaf you like) half a lebanese cucumber, quarter of a red capsicum, half a large avocado and 6 baby roma (or cherry) tomatoes, I roughly chopped them all ….chewing on a stick of celery at the same time… before gently tossing them in the bowl. Slicing about 40gms of vintage cheddar from the block, I used the wide-grater (see the photo) to ‘shave’ the cheese then, adding it to the bowl with a drizzle of extra virgin olive oil (EVOO) and a dash of apple cider vinegar, I tossed the lot together with a little more gusto. A dash of ground black pepper and Himalayan salt and I was ready to dig in.

For something so simple, it’s a rich mix of flavour and texture: creamy, salty, moist and sweet all at once. But best of all, is it’s wonderfully filling thanks to the high fibre and healthy fat content.

An Eclectic Rainbow Salad

Variety is the spice of Life. It also happens to be really good for your body.

That’s why it’s one of the drivers behind the meals I make: the greater the variety of food in a meal, the higher its nutritional content (generally speaking). That’s why ‘they’ say “Eat a Rainbow”.

Well, today’s lunch certainly nailed the colour bit. Which is interesting, considering it all began with a thought about boiled eggs as I drove home from yoga. You see, I often boil a few up and keep them in the fridge (…for moments just like these – instant gratification meals). Mum used to make an avocado, tomato & cottage cheese salad that I loved and even though it didn’t relate directly to my egg craving, I began to envisage a meal based on this combination.Food Fervour

This is how it came together:

Scattering a large handful of roughly chopped baby spinach on my plate, I then topped it with 3 quartered cherry tomatoes, 2 quartered hard boiled eggs, about 5cm of chopped lebanese cucumber and chunks of flesh from ½ large avocado.

Next I piled on about 3 heaped tablespoons of (my homemade) sauerkraut to please my gut bacteria, then a mound (approximately 2 tablespoons) of grated vintage cheddar …simply because it goes so well with avo and sauerkraut (have you ever tried a Reuben’s Sandwich? Here’s a link to my recipe for one of them:

A Probiotic Toastie?

)

That’s kind of edgy enough for a salad but I felt like pushing the boundaries a bit further so, instead of my standard vinegar & oil dressing, I drizzled the plain EVOO (extra virgin olive oil) over everything but followed it with a dollop of homemade sweet chilli sauce on the top. And if that wasn’t daring enough, I sprinkled approximately a dessertspoon of nutritional yeast flakes over the whole lot. BOOM. Gut-lovin’!

Now admittedly, even before I tucked in, it crossed my mind that I might’ve gone too far: gone overboard with elements & confused the flavours …but I wasn’t disappointed. I ate the lot. Maybe I was too hungry to notice whether the flavours really worked together or not? So please, by all means, if you decide to try this meal for yourself, and you come to a different conclusion, feel free to remind me that sometimes nutrient density should take a backseat to simplicity…

Bulletproof Turmeric

You’re probably thinking “What the..?” But I didn’t know what else to call this amazing warm bevvy. It’s possibly an acquired taste, but given it is loaded to the hilt with health-giving properties, I’ve fallen in love with it…

Food FervourMost people know by now how good turmeric is for you. It’s classified as a “Superfood” (if there is such a thing) because its active ingredient, curcumin, is a powerful antioxidant and has highly effective anti-inflammatory properties. I’ve often wondered how to get more of it into my diet …without having to eat curries …daily. This drink is my answer.

I’ve seen many references to hot turmeric drink recipes, but most of them involve milk of some kind (which kind of stands to reason if they happen to be named ‘Golden Milk’). Now, whilst I don’t have an issue with milk per se, I definitely find heating water much quicker, easier & cleaner than heating milk. (And what the heck; there’s also the calorie argument if it really matters to you!)

So when I read the recipe for ‘Turmeric Tea’ on Russell James’ website the Raw Chef I was keen to try it, and then I realised its similarity to the Bulletproof coffee phenomenon: black coffee blended with ‘healthy’ fat is supposed to increase satiety, reduce caffeine reactions (like jitters) and improve mental clarity. But when I tried it, I just liked the way it made the coffee creamy. And this is pretty much what happens in this drink. But the oil also, more importantly, aids in the absorption of the star ingredient, as curcumin is fat soluble.

So vegans, lactose-intolerants and lazy people rejoice: this is a super-easy, delicious, caffeine-free health-giving concoction! Just a few words of warning, however: turmeric stains. I haven’t really had a huge issue with this (maybe I’m lucky) but be prepared for some yellowing of your equipment. Secondly, and more importantly, blending warm or hot liquids can be dangerous. Never use boiling water in an airtight blender: pressure build up can cause serious injury. Thermomixes are designed to handle this kind of use so they are the best option. Hand-held (stick) blenders obviously allow airflow, but I’m not sure how effective they will be for the entire process (the first step involves pulverising the turmeric). I have made the tea successfully in my Magic Bullet, but I ensured the water temperature was below 70º and opened the container slowly (there was still the hiss of a pressure release). Whatever you opt for, please take care.

Food FervourYou only need five ingredients for this brilliant beverage: water, turmeric, coconut oil, honey or maple and black pepper (apparently a substance in this called ‘piperine’ aids curcumin absorption by 2000% Reference: Authority Nutrition)

1 cup hot water (I used ½ cup boiling water + ½ room temp, but vary according to your blender option)

1 finger fresh turmeric, (approx 4-5cm long) peeled and roughly chopped (apparently ½ teaspoon of powdered turmeric is an acceptable substitute but I’d urge you to avoid processed foods where possible!)

1-2 teaspoons honey (or maple syrup for vegans)

1 tablespoon coconut oil (my aim is to try butter and even macadamia oil myself, in future. Let me know if you do and how it goes!)

a good pinch of black pepper

and perhaps ground cinnamon for dusting

Simply add the turmeric to the hot water and blend at high speed for approximately one minute. If you’re particular about ‘bits’ in the bottom of your cup, you could strain the fluid through a fine sieve (like a tea strainer or infuser) but I actually didn’t find there was much left …so save on your washing up and just consume the ‘wholefood’.

Add the honey, oil, pepper and wazz it up again for anywhere between 15-30 seconds. Pour into your teacup or mug immediately and watch the ‘froth’ form as you dust with cinnamon. Enjoy every golden sip.


Dirty Mango Daiquiri

Why Dirty? Because we all know that daiquiris are normally made on the fresh ‘clean’ spirit, white rum. The stuff that costs that little bit more than white wine, relatively speaking…

This cost-effective, “dirty”, but surprisingly palatable little daiquiri was born of a bottle of riesling I had sitting in my fridge. I’m not really a fan of white wine, and particularly not sweet whites, but rather than throw it out or waste time trying to find something to cook with it (there’s that theme about wastage again…) I decided to celebrate Friday afternoon/evening in a way that is slightly out of character for me…food fervour

And it was only possible thanks to the store of mango cheeks I have in my freezer. White wine + mango = surely a winning combination?

Yup. Well, so I am thinking after downing one. And might I add, I certainly didn’t measure anything so… you may need to ‘tweak’ to your liking…

All you need is a high powered blender, the frozen flesh of 1 or 2 mangoes and however much white wine you’d like to polish off…?!?! (Dry or sweet – I’m sure it wouldn’t matter. Much?)  Okay, okay, I think I used about 400mls. Put it this way: the less wine, the more viscous the cocktail. And if your mango doesn’t happen to be frozen, well, sheesh, it makes sense doesn’t it? It’ll be more fluid and slightly less brain-freezy.

Chuck it all in the blender and ….blend well. (Thermies, I think I had it on speed 9 for about a minute, but then added more wine and dropped it back to speed 5 for about 20 seconds) Imbibe immediately and follow up with food and/or lots of water….

The Hardcore Green

I’ve mentioned quite a few times how great watercress is for you: it’s the most nutrient-dense plant food you can get. Yes, it beats kale and spinach.

Unlike spinach however, watercress (and kale for that matter) don’t rate highly on a palatability scale. Well, not mine anyway. But I will give watercress the time of day because of its nutrient status.

So finding things to do with it is pretty difficult. It’s quite peppery so you usually wouldn’t want to use much. Food FervourA little in salads, sometimes soups, but I usually always revert to smoothies. They’re easy, and I can tolerate a larger ‘dose’ …Sorry, I’m really making it sound like medicine, huh? But according to Hippocrates it is, so give me this over a pill anyday…

Today however, I went overboard. I’ll blame the seller at the farmer’s market: the bunch of watercress I got for just $2.50 was so huge I wasn’t able to fit it in my fridge. I typically resolve this kind of issue by using some immediately. Hello, breakfast!

Food FervourThe problem was I had to chop one helluva lot off it to fit it in the placcy bag, in the fridge …see the pic: that’s the ‘handful’ in relation to my not-too-small (2 litre) Thermomix. If you are going to give this smoothie a go, I’d suggest you halve what I used. Unless you’re Hardcore. Like me. (Pffft!)

Simply blend a handful of watercress with the flesh of one mango, 200-300gm fresh pineapple (more or less, to taste: this is fruit that best ‘tempers’ the watercress) and 200mls of cold or coconut water. (Thermies, I blended it on speed 9 for 1 minute). Fresh mint may help to somewhat disguise the fiery watercress and will complement the tropical fruits as well.Food Fervour

Check out the rich green of my ‘hardcore’ (OD) watercress smoothie. Pretty colour but talk about a fire in my (throat and) belly!

Mushroom, Leek & Spinach Stew

With below average winter temperatures here on the Gold Coast at the moment I’m craving warm comfort food a bit more than usual… but tonight I was feeling pretty lazy.

I had my mind set on using up the button mushrooms and leek in my fridge so searched for some inspiration on Google. Nothing particularly hit the spot, so I ended up combining ideas from three different recipes: a vegetarian mushroom stroganoff, a leek & mushroom pasta dish, and an actual leek & mushroom stew…food fervour

It’s not like me to limit the veggie content to just three in most of my meals, but I was tired, and running behind, and just too plain lazy to go the extra mile. Maybe it had to do with the fact that I’d made a batch of gluten free cacao chip biscuits earlier in the afternoon and eaten a few too many of them?

Contrary to its deceptive title, this dish is not vegetarian: I deliberately opted for beef stock to pump up the stew’s flavour. Chicken stock would enrich the mushrooms as well, but Veggos, I am certain that veggie stock would still taste terrific, should you wish to try it (…and please let me know how you go if you do!)

For a solid single serve, you will need 2-3 tablespoons extra virgin olive oil, 1 finely chopped clove of garlic, 1 leek thinly sliced, salt & black pepper to season, approximately 200gm sliced mushrooms, 200mls beef (or veggie) stock, 1 teaspoon thyme, ½ teaspoon sage, 40gm cream cheese, 100gms baby spinach.

Heat 1 tablespoon of the olive oil in a frypan over a medium heat and cook the garlic and leek for 3-4 minutes (until the leek has softened) stirring occasionally. Season with salt & pepper, then add the remaining oil and the sliced mushrooms, cooking for another 3-4 minutes, again stirring occasionally. Add the thyme, sage & stock, bringing to a boil, then reduce to simmer for about 10 minutes. Mix the cream cheese through then add the spinach, stirring until it has just wilted.

Serve immediately and enjoy immensely! If you’re super hungry, I can imagine a chunk of bread would compliment this perfectly and help you mop up every last drop from your dish.